Introduction
In this section, you will get familiar with adding new products to your store.
Adding New Products
To add a new product to your store, within your store's Merchant Back Office, select the Products tab on the left-hand side. When it expands, select Add Products:
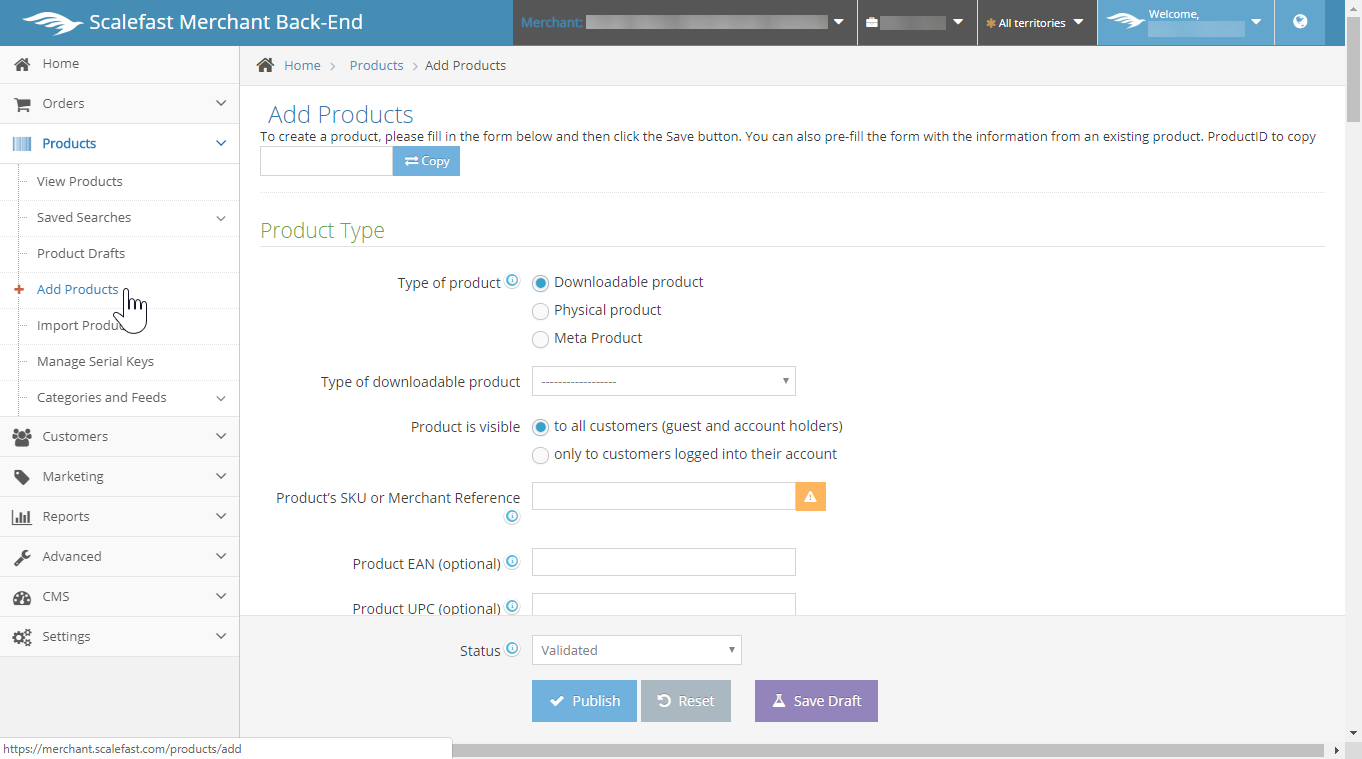
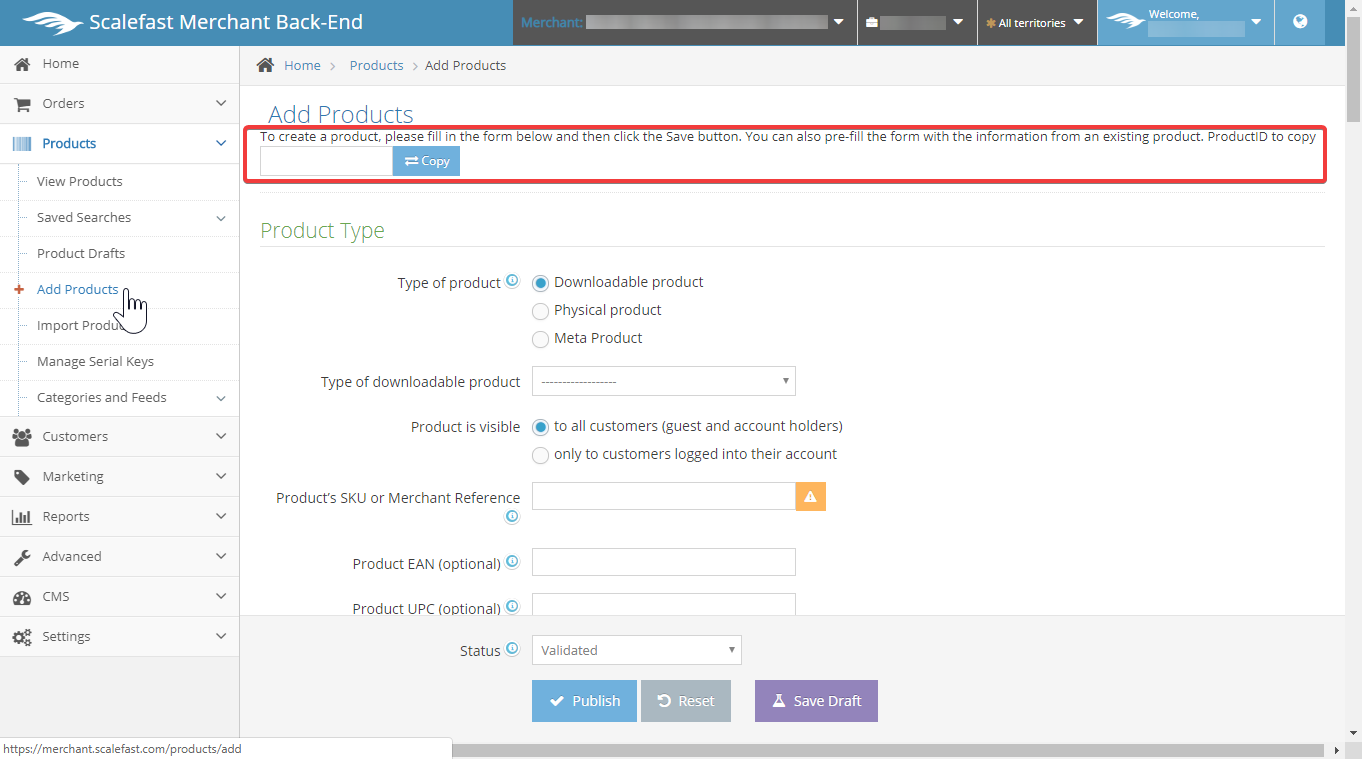
If you would like to copy the fields to pre-fill your new product from an existing product on your store, enter the ProductID and select copy, which will then prefill each field.
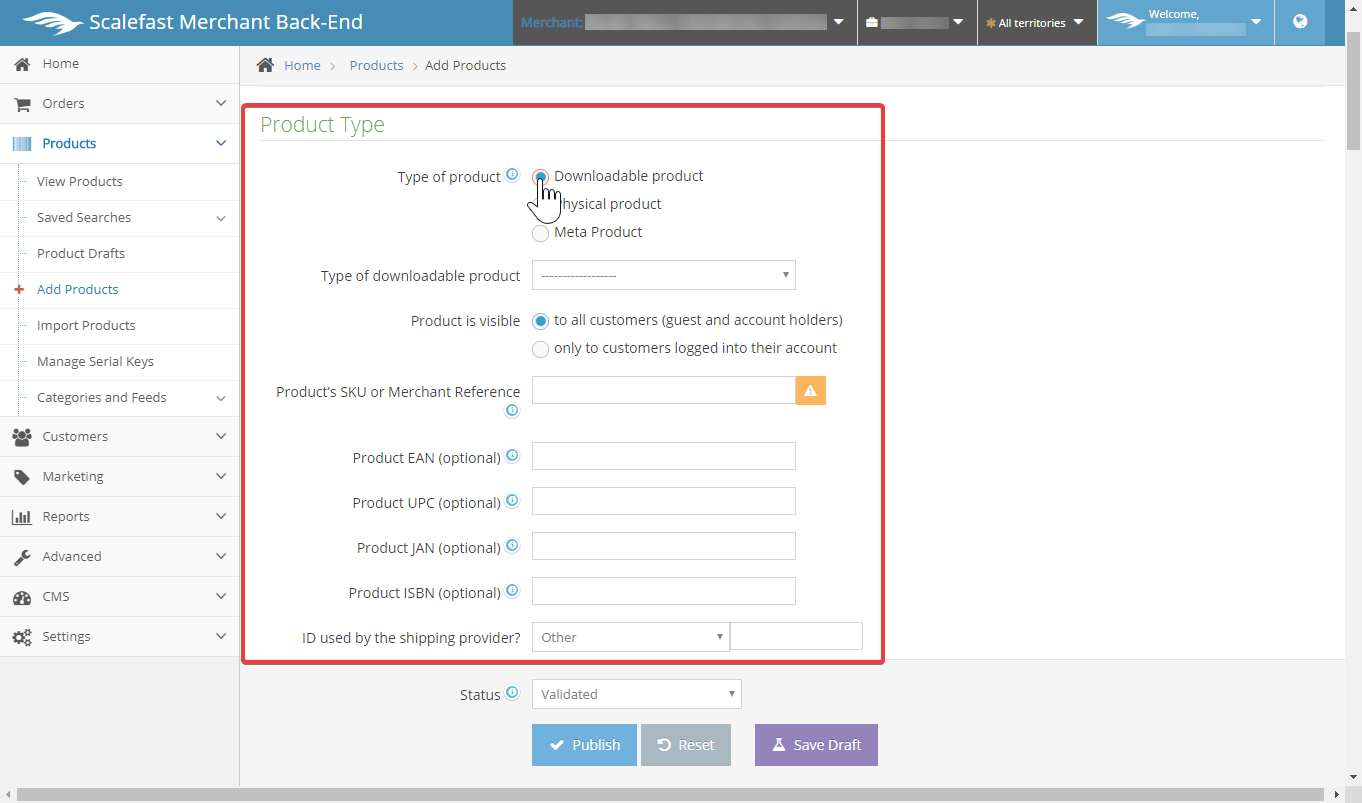
Under the Product Type section, select the Type of Product. Product types are downloadable, physical, and meta products.
If the product is a downloadable product, select Type of downloadable product drop down. Type selection include Software/Games, Text File, Image, Audio, Video and Archive.
If the product is visible for all customers, including guest and account holders, keep "to all customers" radio button selected. If you would only like customers who are logged in to see the product, select this option instead.
Next, enter your Product's SKU or Merchant Reference, this is mandatory. Other optional fields include EAN, UPC, JAN, and ISBN.
Lastly, under "ID used by the shipping provider", select the reference number in which the shipping provider refers to.
Measurements
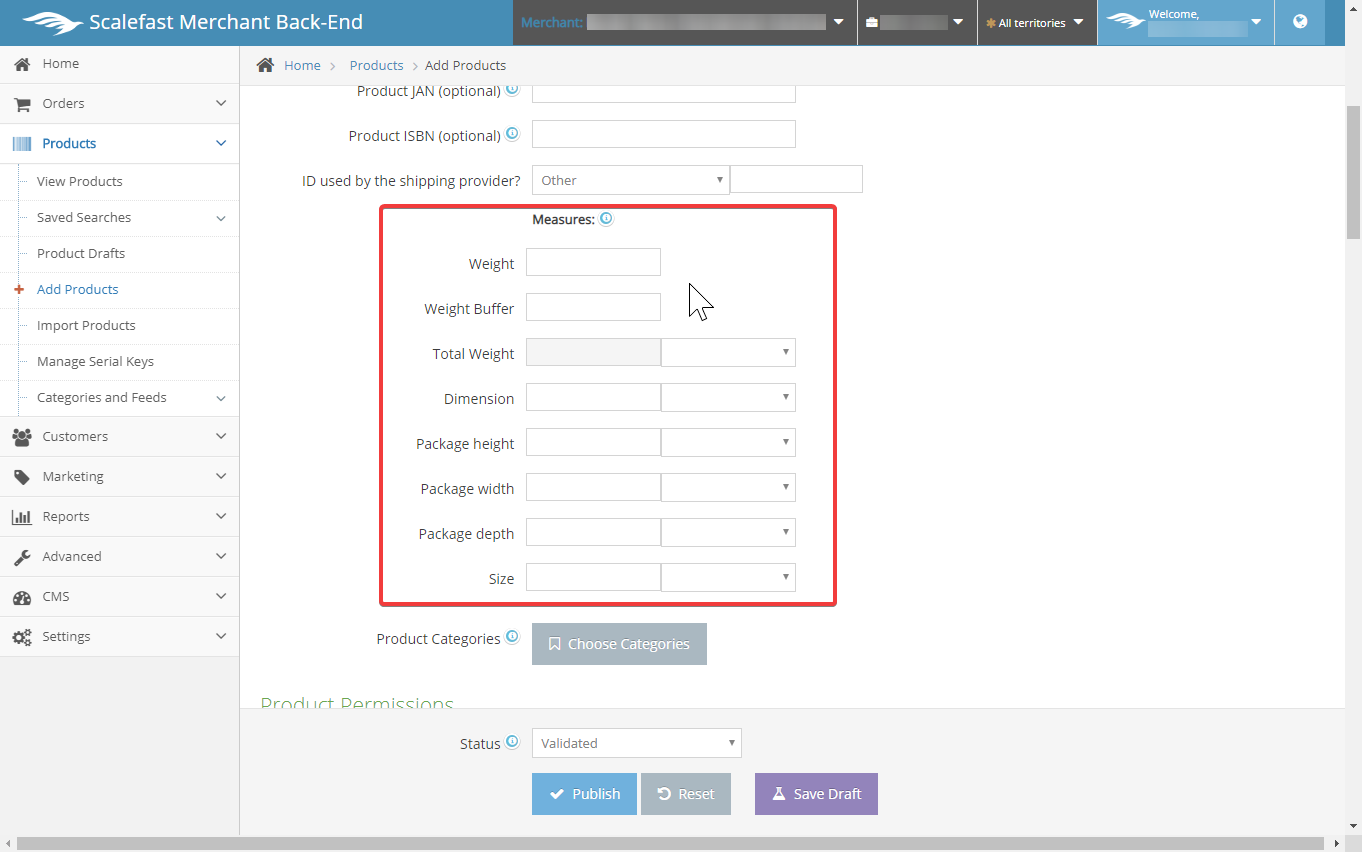
Continue to scroll down to the next set of fields, labeled Measurements.
If applicable, enter the Weight, Weight Buffer, Total Weight, Dimension, Package height, Package width, Package depth, and Size.
Categories
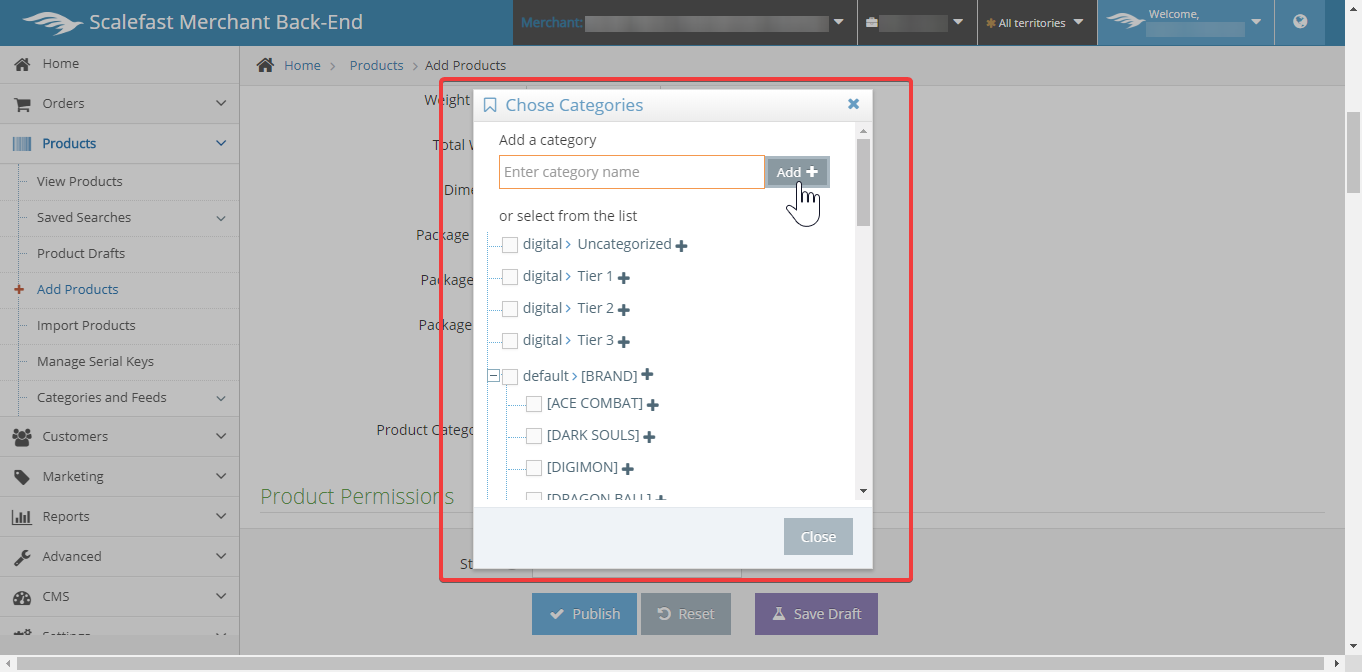
If you need to add your product to existing categories, select the Choose Categories button below the measurements fields.
To add a new category, add a Category label in the category name field, then select the Add+ button to the right of the field.
To add your product to one or more categories, check the boxes pertaining to each applicable category.
Select the Close button on the bottom right of the pop up window to save the categories.
After adding your product to the appropriate categories, continue scrolling down to the Product Permissions section. There are two options that can be selected, products can be purchased to everyone, or to only logged in customers.
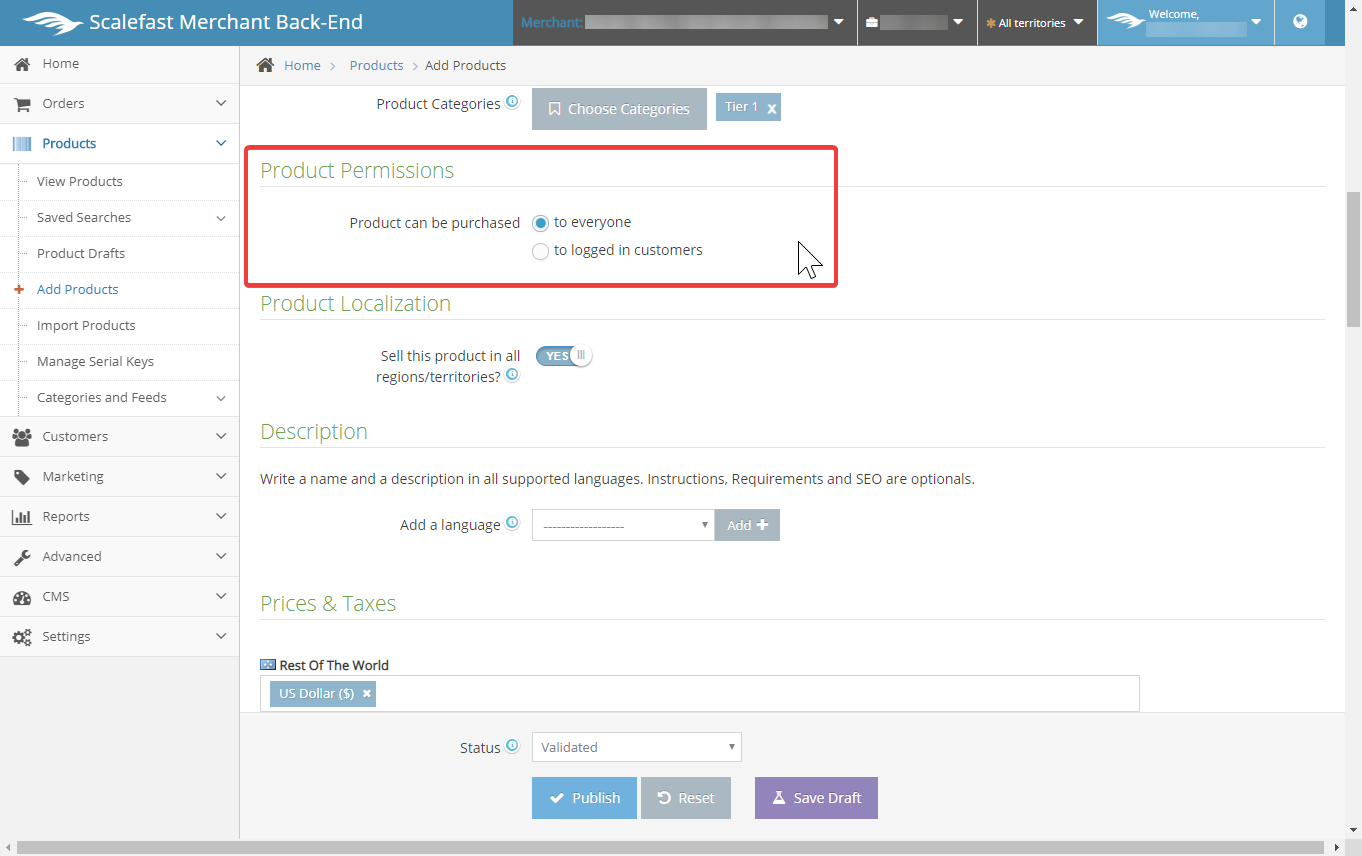
Next, set the Product Localization. By default, the product will be set to sell in all regions/territories.
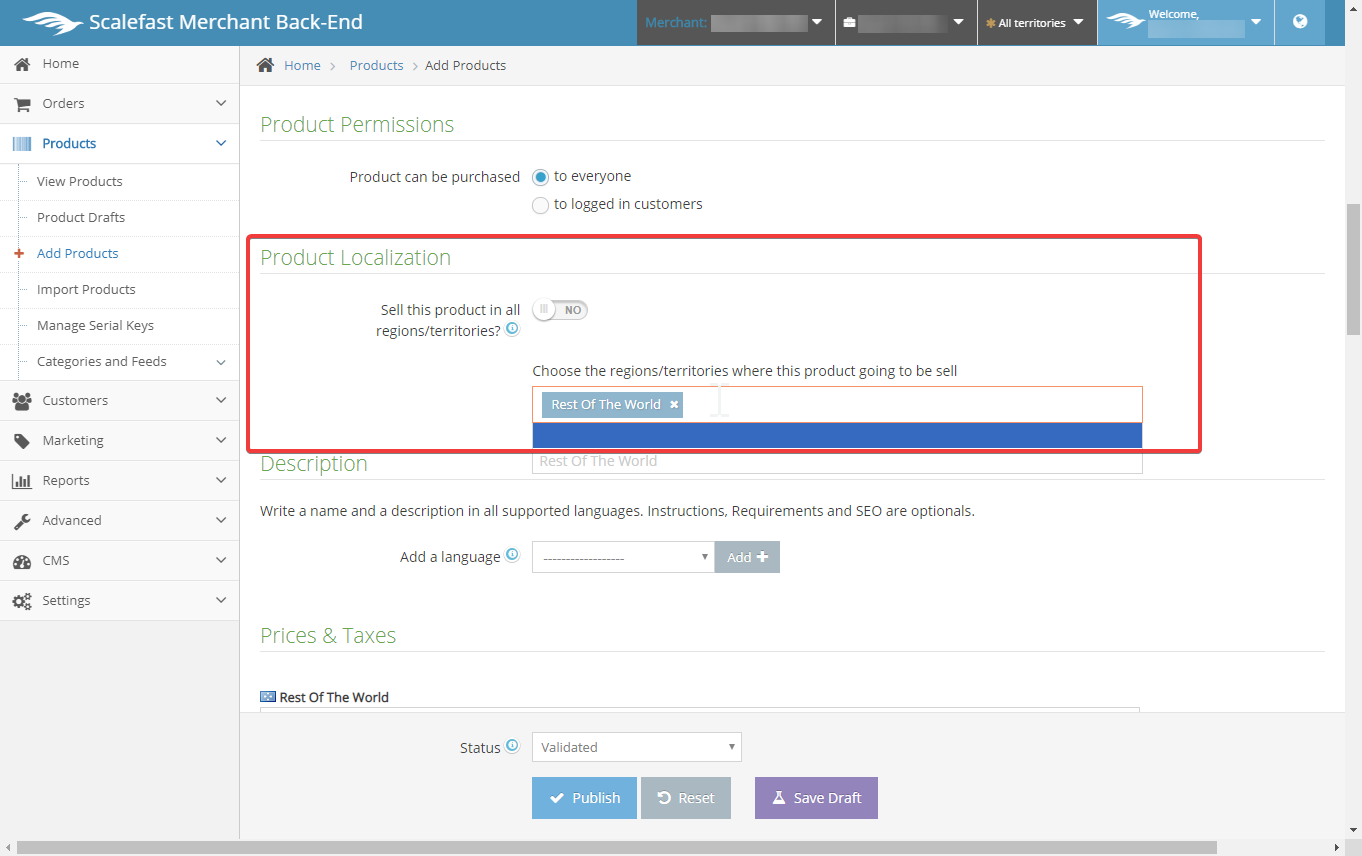
If you wish to not sell the product in all regions/territories, switch the "Yes" to "No".
Territory fields will display below this field in order to select one or multiple. Select the field containing the default territory, and a drop down of additional territories will appear. Select one or more pertaining to where you would like your product to be sold.
Descriptions
To add your product's title, description, and SEO meta data, scroll down to the Description section. Each language needs to be added and completed on their tabs before adding the next language.
Under Add a Language, select the drop down field and the language that you would like to add. Once it is selected in the drop down, select the Add+ button to the right and the select language bar of tabs will display below.
Help tip: Use the "i" icons to the left of the fields in each tab to get more information.
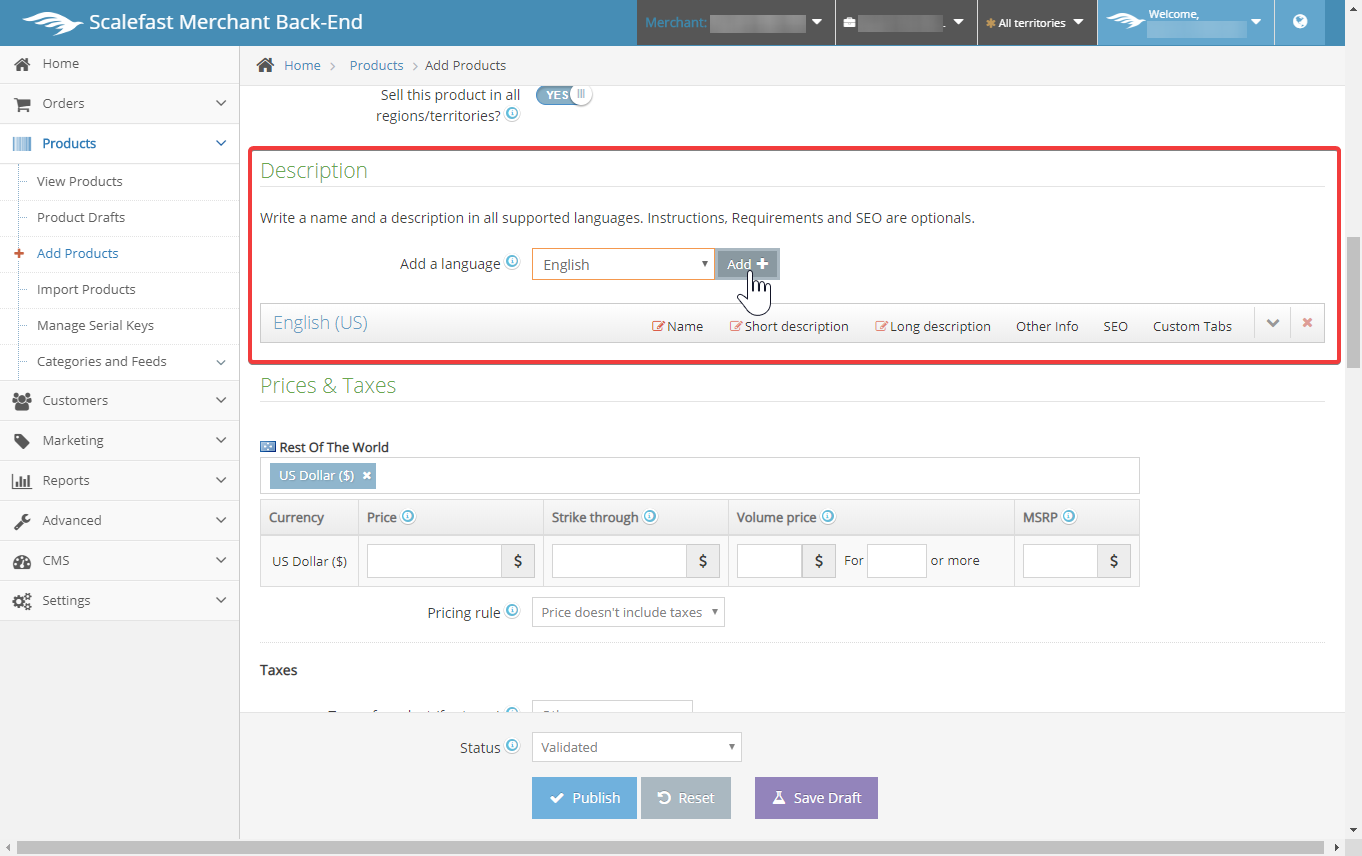
Within the language bar tabs, the Name, Short description, Long description, Other Info, SEO, and Custom tabs can be set. If you would like to remove the language, press the "x" symbol on the far right of the language bar.
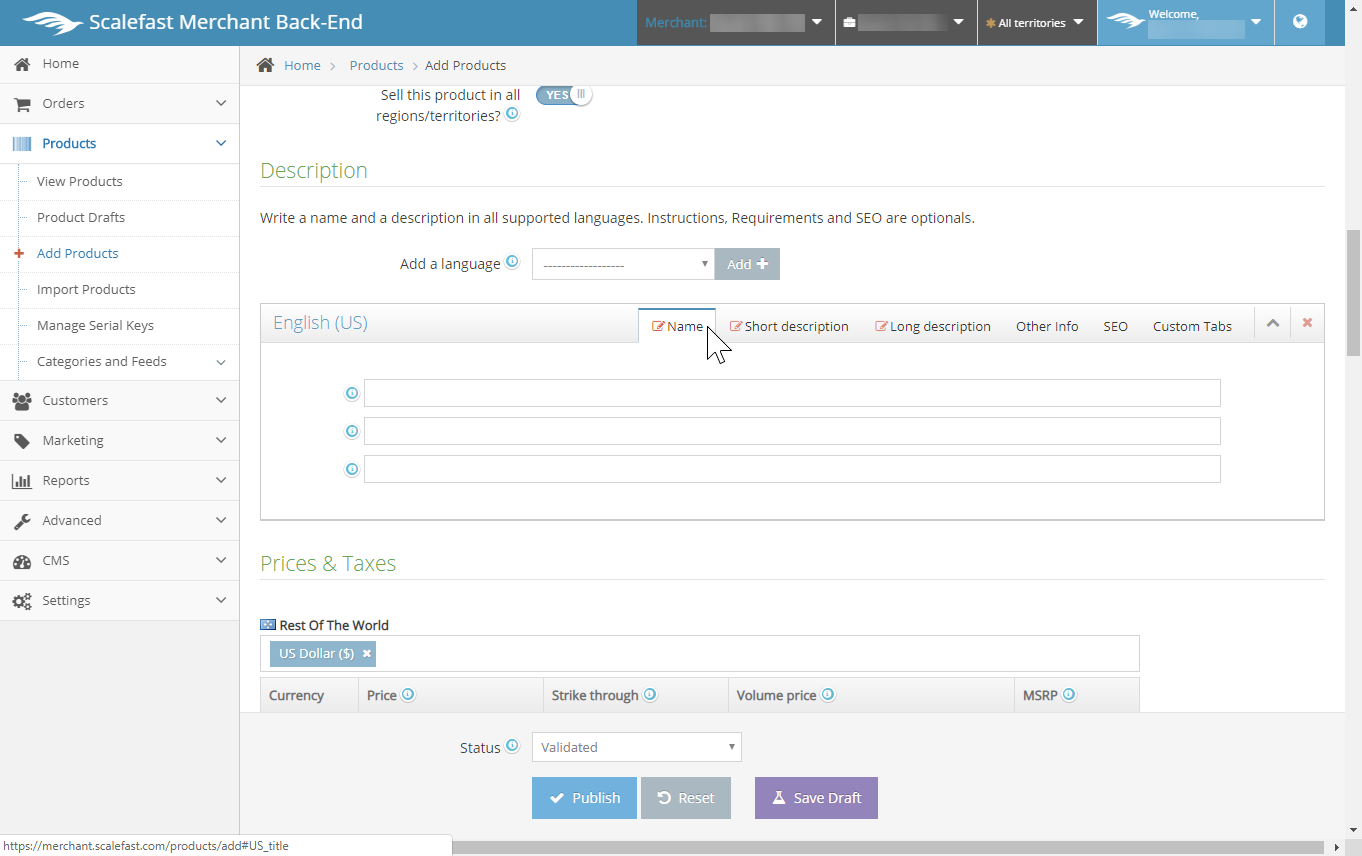
To start adding to your description section, first select the Name tab. Three fields will appear.
In the first field, type the product name exactly as you would like it to appear online. In the second field, type the product name exactly as you wish for it to show on the home page. In the third field, it is for internal use only, the label will not appear online.
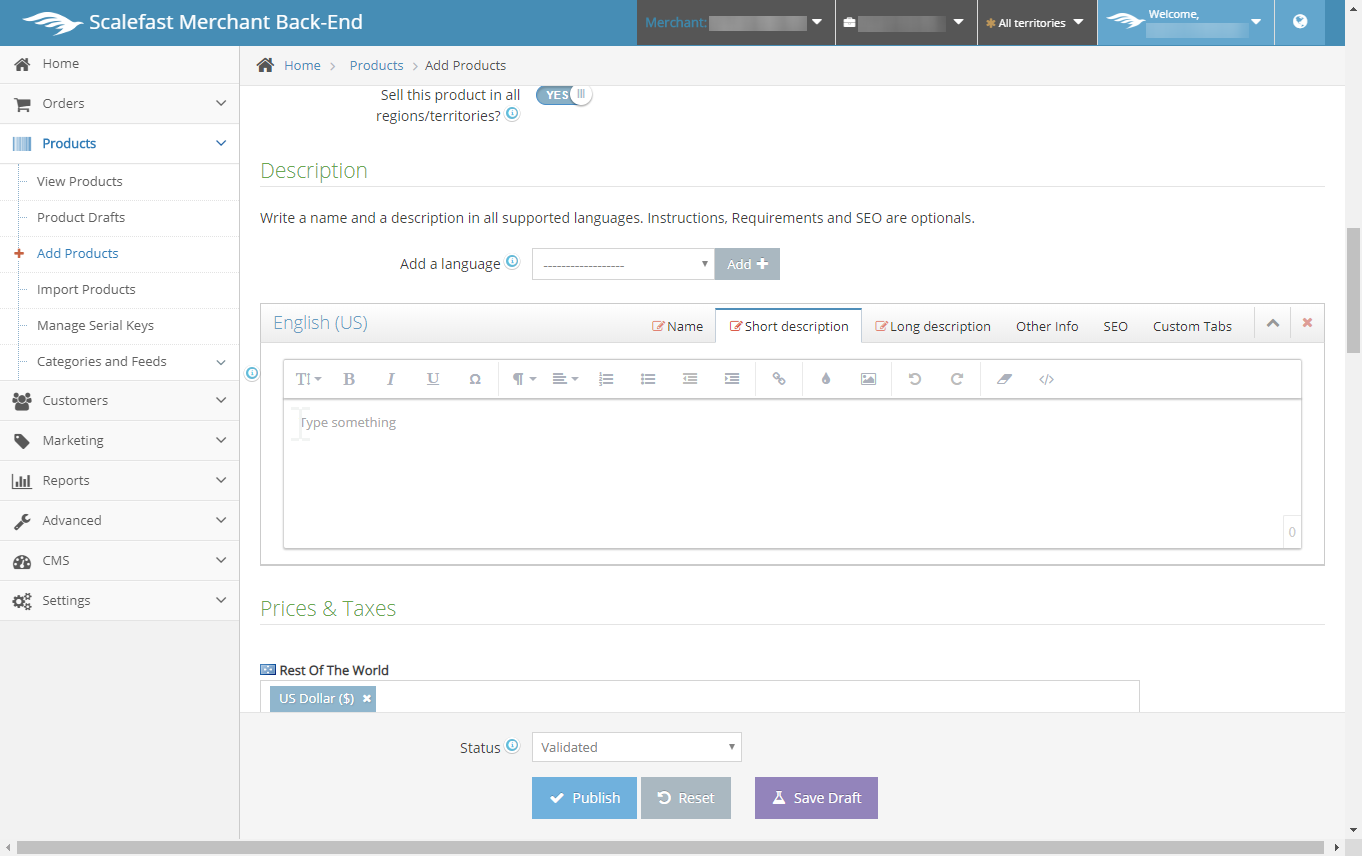
Next, select the Short Description tab. This is the abridged version of your product's description, recommended to keep between only 200-250 characters.
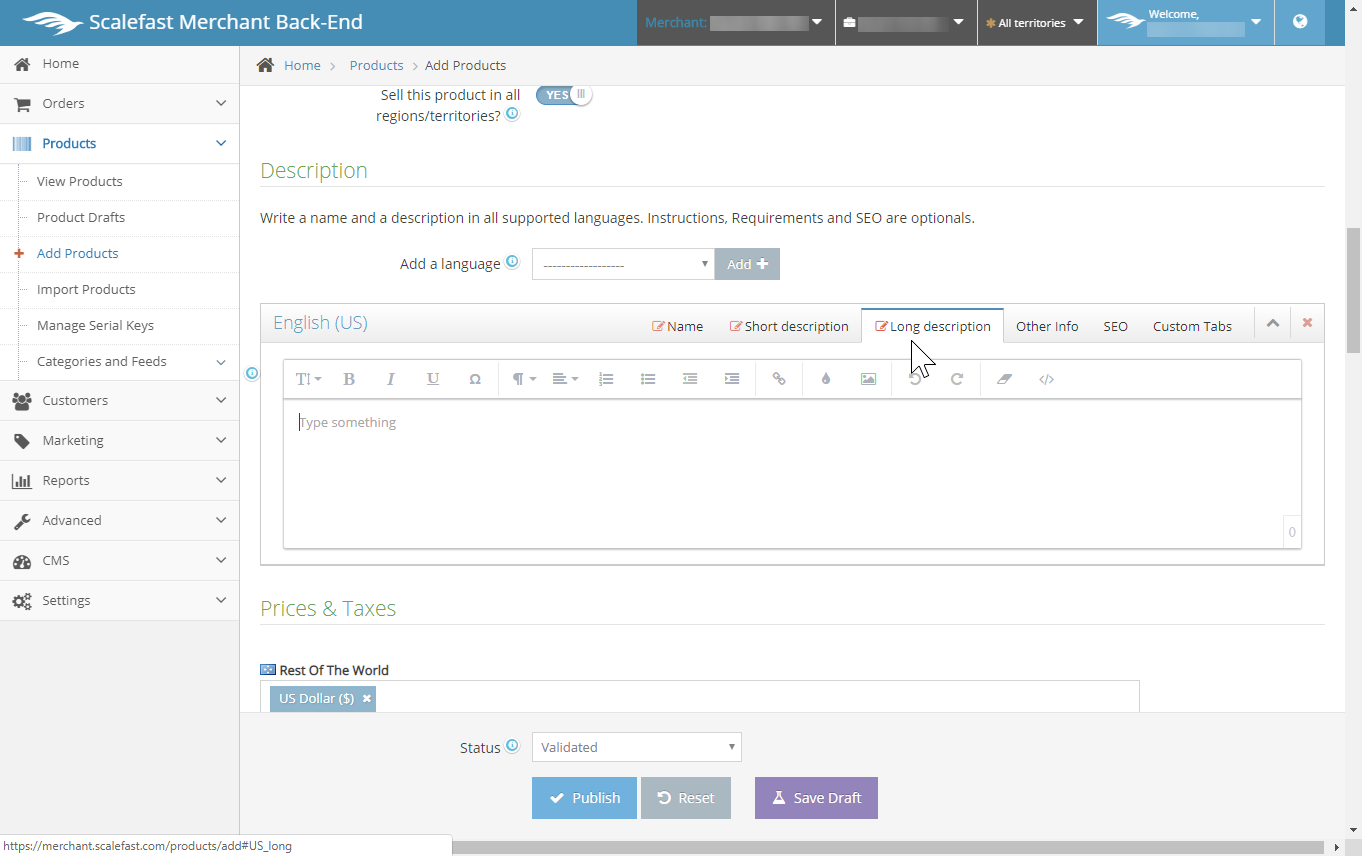
Select the next tab to the right, labeled Long description. In this field, enter your product's full description. We recommended a minimum of 1600 words.
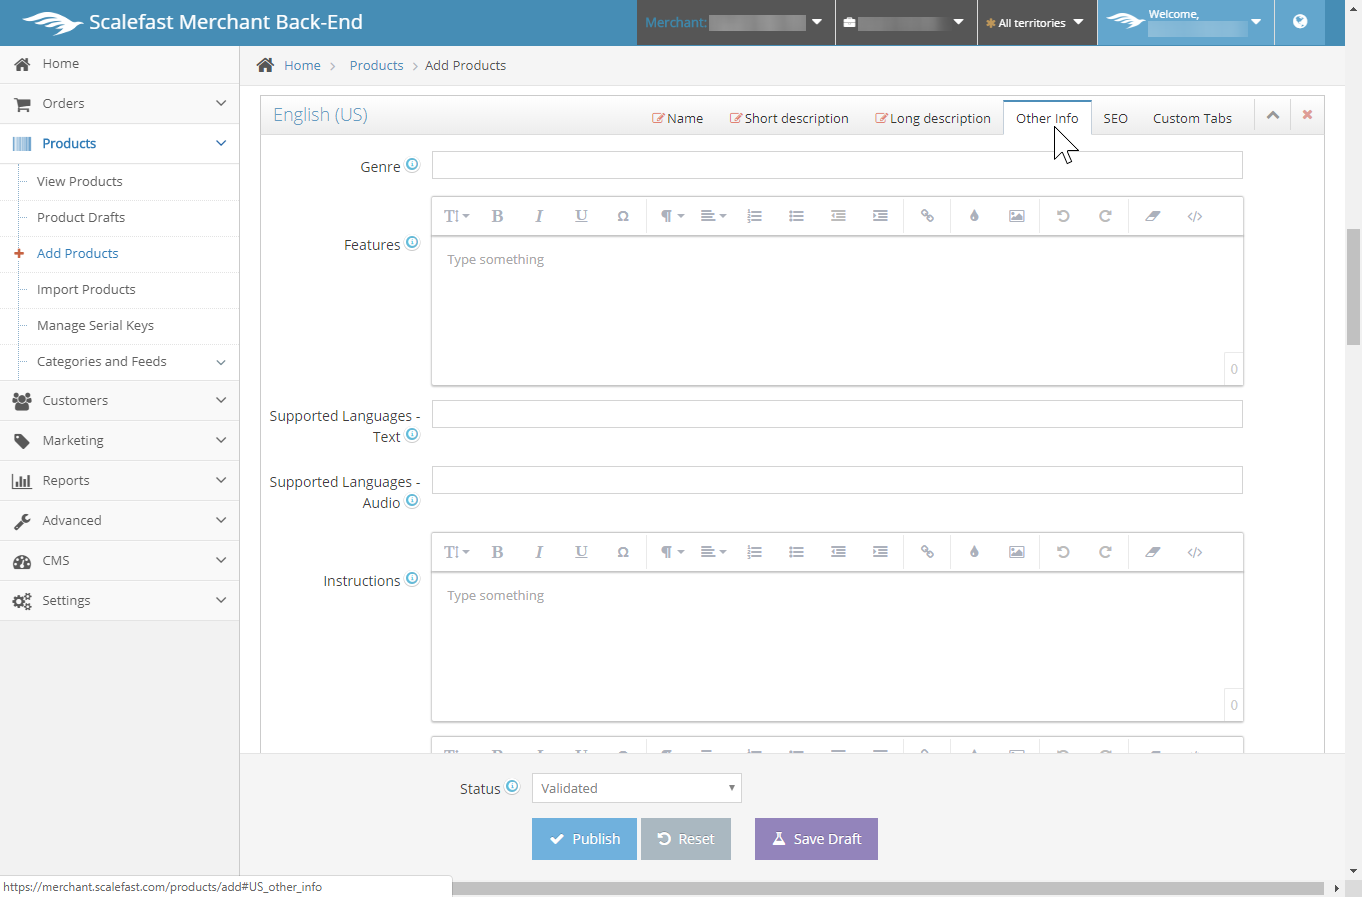
The "other info" tab displays a variety of fields, that if pertain to your product, should be filled out. The fields include: Genre, Features, Supported languages (text/audio), Instructions, Requirements, Legal Notes, Additional Description, and Out of Stock text.
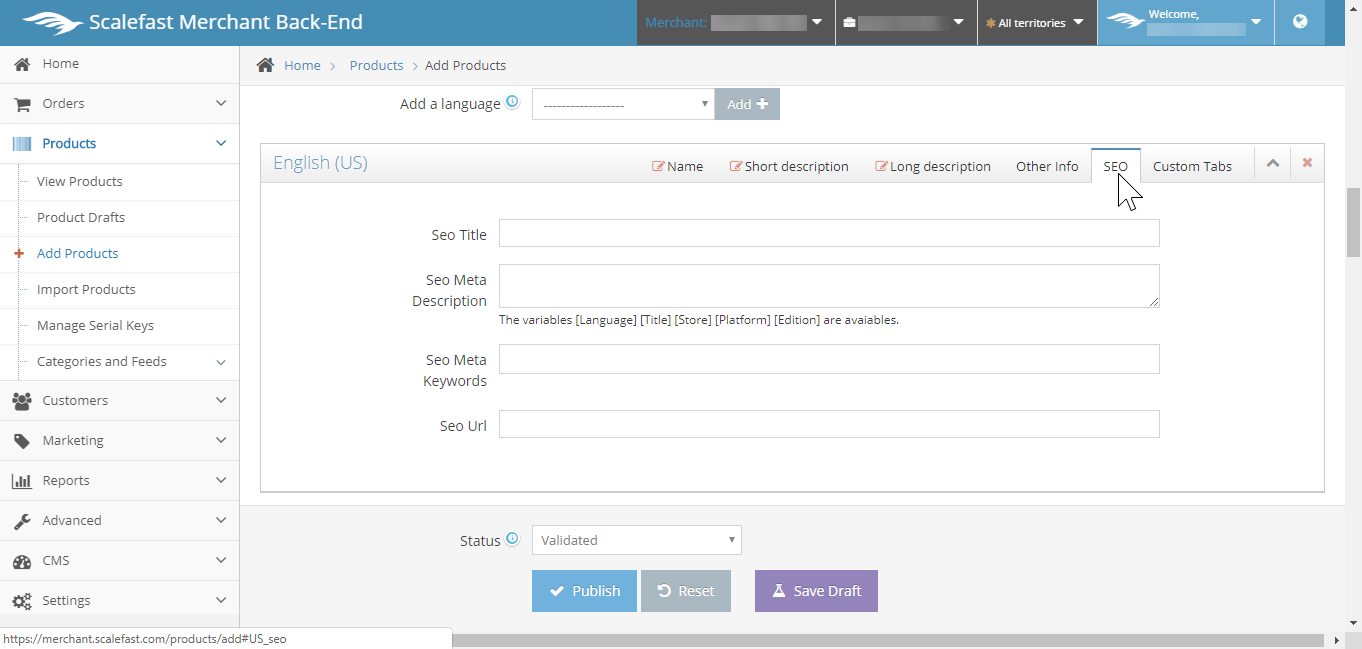
Search Engine Optimization (SEO)
In the next tab to the right, select SEO. The content entered in the SEO fields will display in the search engine results. We recommend that the SEO title remains 50-60 characters, the SEO Meta Description up to 155 characters, SEO Meta keywords strings should be separated by commas, no more than 10-15 words total. If you would like the URL to appear different from the product page URL, enter the URL in the last field.
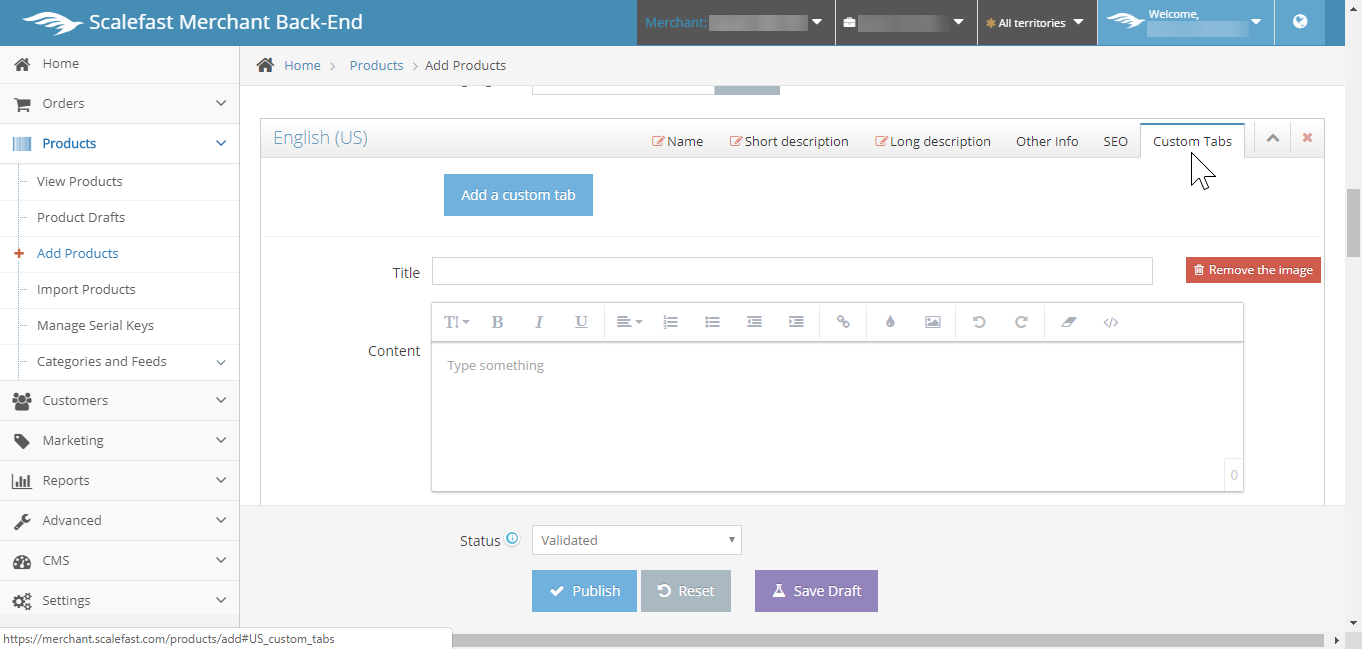
Customization
The last tab on the right is for Custom Tabs. These tabs can be filled out, then integrated to your product manually by our team upon request.
NOTE: Repeat the above steps for each language if you would like to offer your product information in more than one language.
Price & Taxes
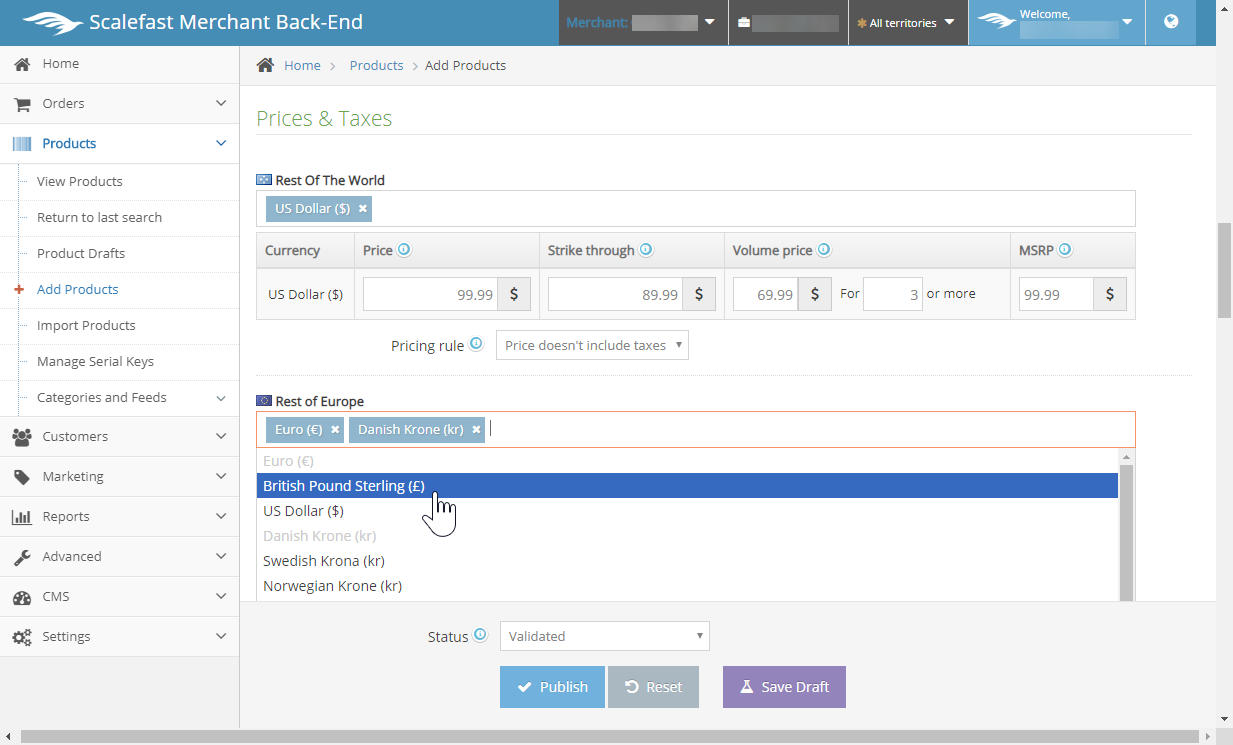
Once your product descriptions and languages have been set, continue to scroll below to the Price & Taxes section. In this section, each of the territories that you offer your product in are displayed.
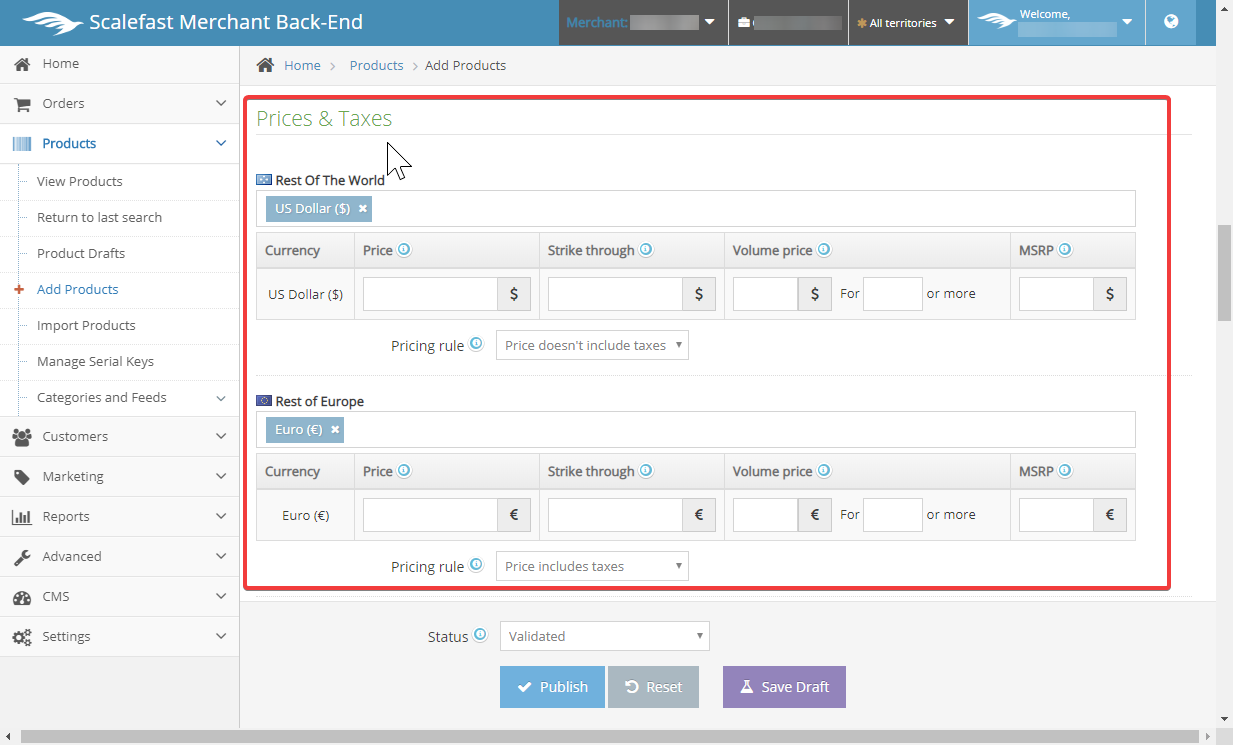
If the currency within your territories is correct by default, fill out the following fields that apply to your product pricing:
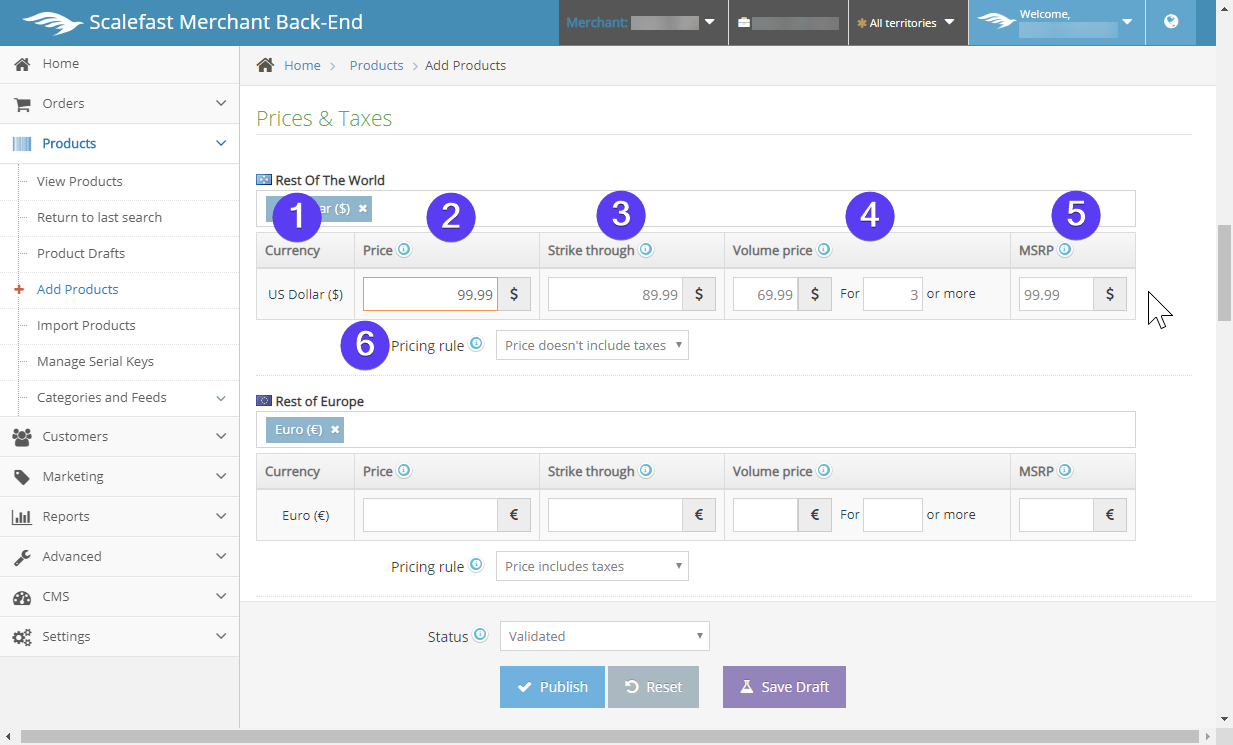
- Currency - The selected currency will display in it's own row with its pertaining fields horizontal to the right.
- Price - The price that will display to the customer.
- Strike through (optional) - If a discount will be applied, the price set in Price column will display with a strike through, and the price set in the strike through field will display next to it without the strike through. Ex: $89.99 ̶$̶9̶9̶.̶9̶9̶
- Volume price (optional) - If you would like to reduce the price for a certain quantity of units purchased in one order, fill in the unit price and the amount of minimum units required for discount to be applied.
- MSRP - MSRP typically matches the non-discounted price in the Price column. For accuracy in revenue reports, it is important to make sure this field is filled in and accurate.
- Pricing Rule - This drop down has two options, "Price doesn't include taxes" and "Price includes taxes". If the price is set to not include taxes, taxes will be added in addition to the display price during product checkout. If the price is set to include taxes, the taxes are accounted into the display price, which is the same price that will be charged during checkout.
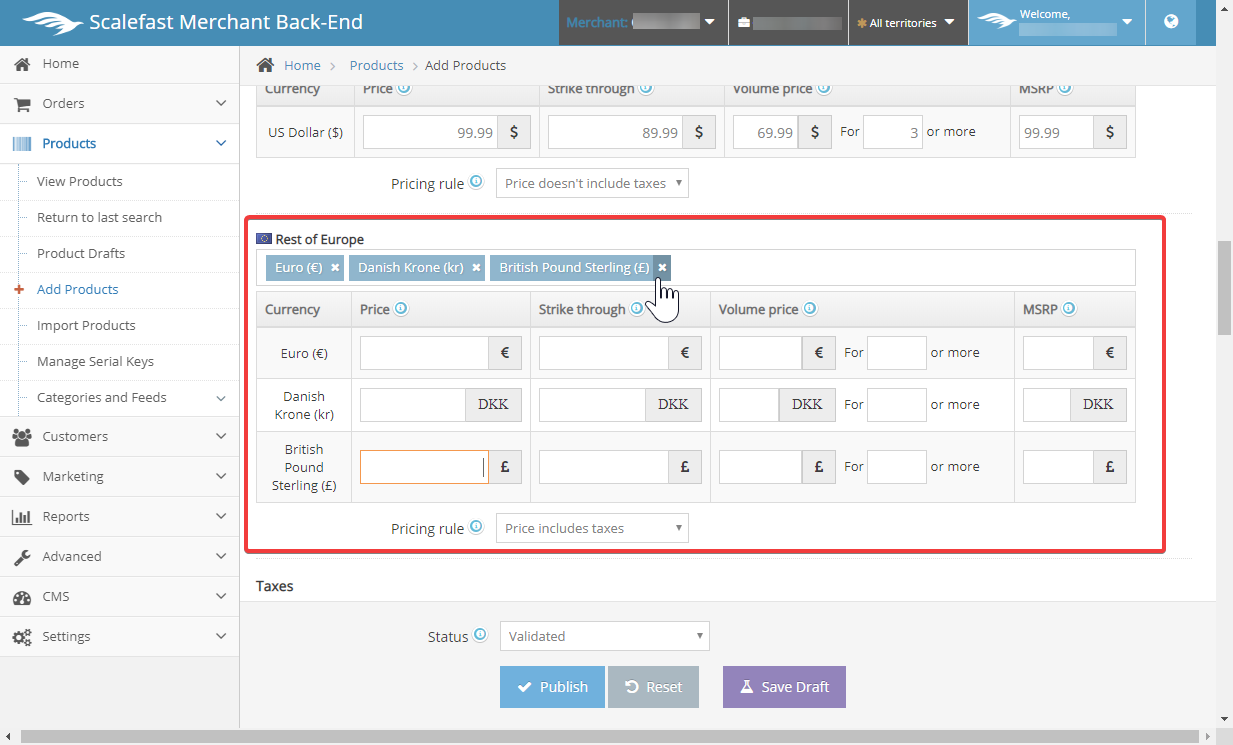
To select additional currencies for each territory, select the field next to the currency tab and repeat the steps above:
If a currency needs to be removed, select the "x" within the currency box that you wish to remove:
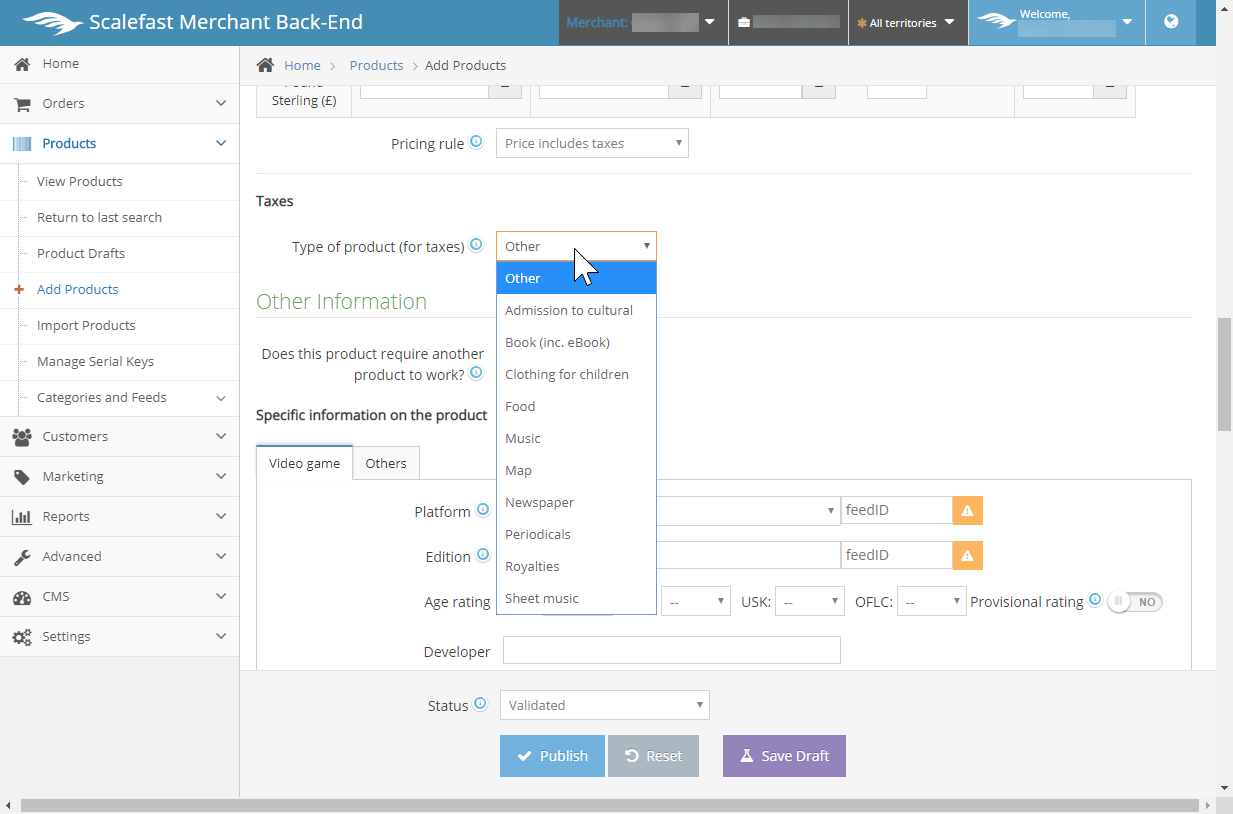
Continue scrolling below the currencies section to the Taxes section. Product categories may be subject to different taxes in various countries, we recommend completing this drop down. If you are unsure what to select, leave as "Other" and consult your Client Success Manager.
Categories include: Admission to cultural, Book (including eBook), Clothing for children, Food, Music, Map, Newspaper, Periodicals, Royalties, and Sheet Music.
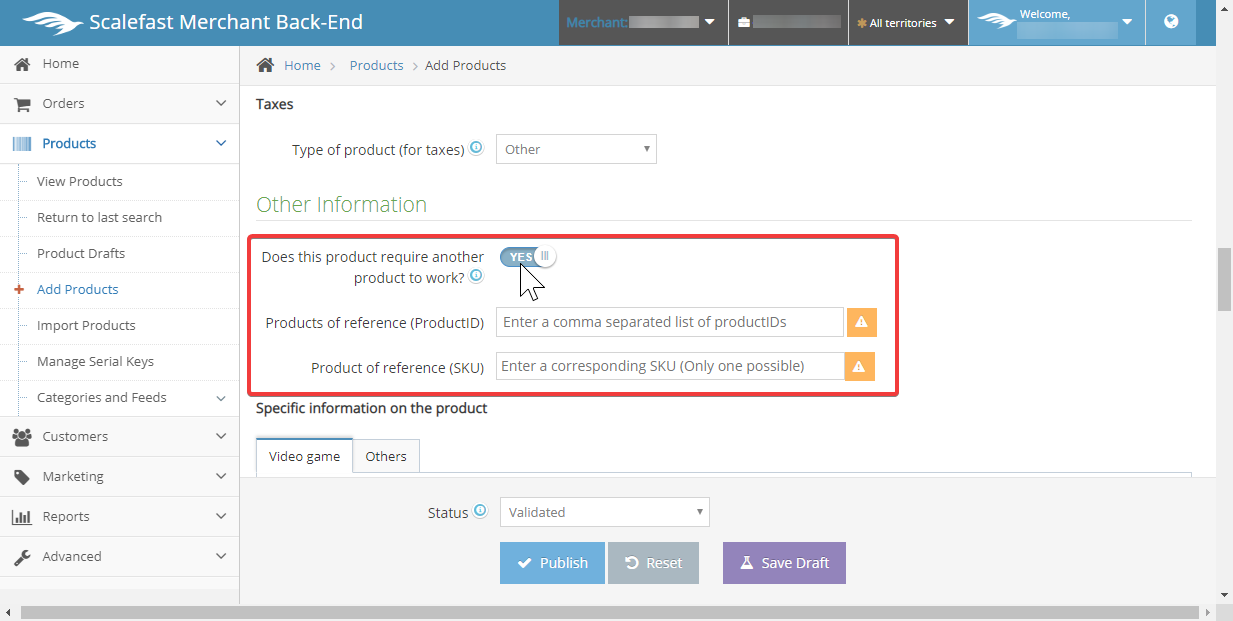
Scroll below the taxes section into the Other Information section.
If the product does not require another product to work, leave the default selection to "No".
If the product does require another product to work, select the switch to "Yes" and two fields will display below.
Enter the products of reference, by Product ID, separated by commas if related to more than one product.
If you do not wish to use a Product ID, products can be set by SKU instead, only one of possible.
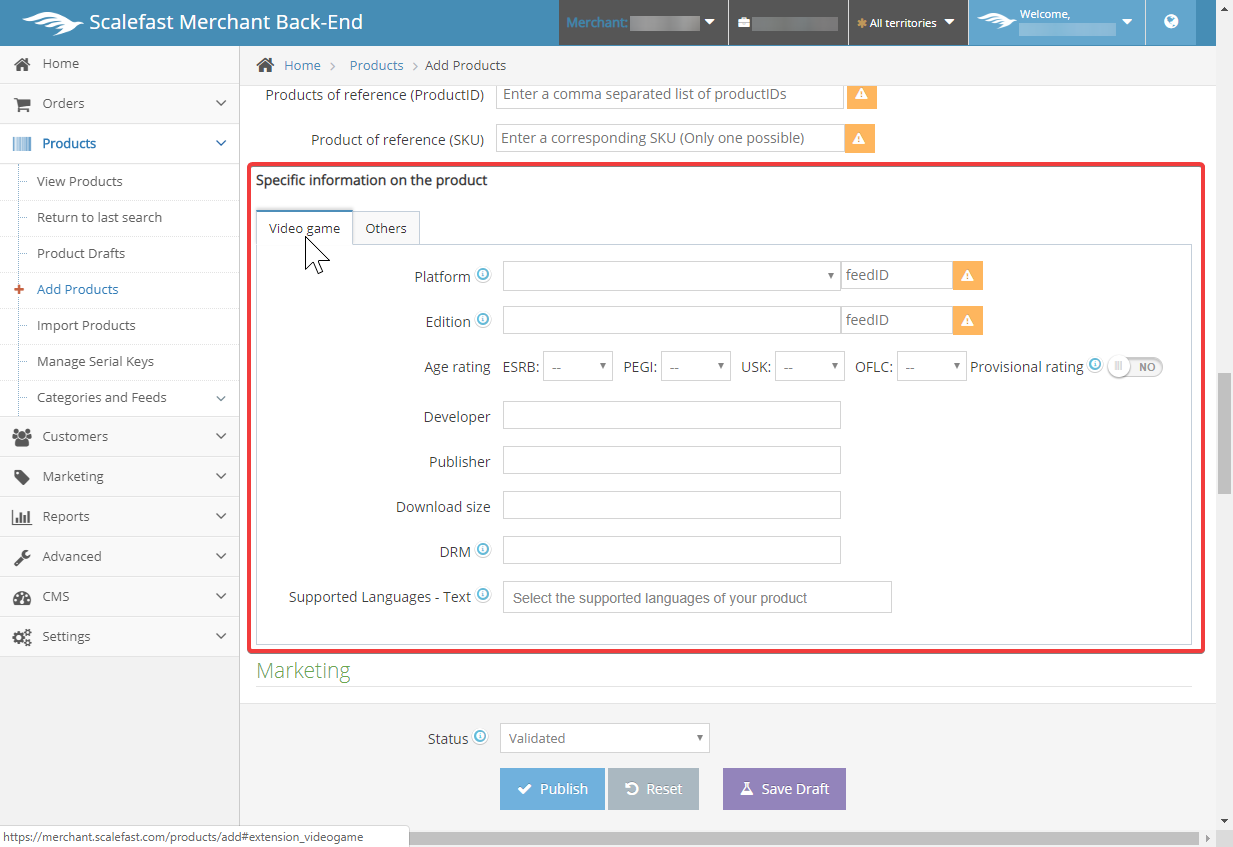
Below this section contains more fields for specific information on the product. By default, the labels of the fields pertain to Video Game attributes. If the fields apply to your product, complete with as much information as possible.
If the fields are not related to your products, consult your Client Success Manager to discuss customizing the dashboard fields that are specific to your product.
Product Fields
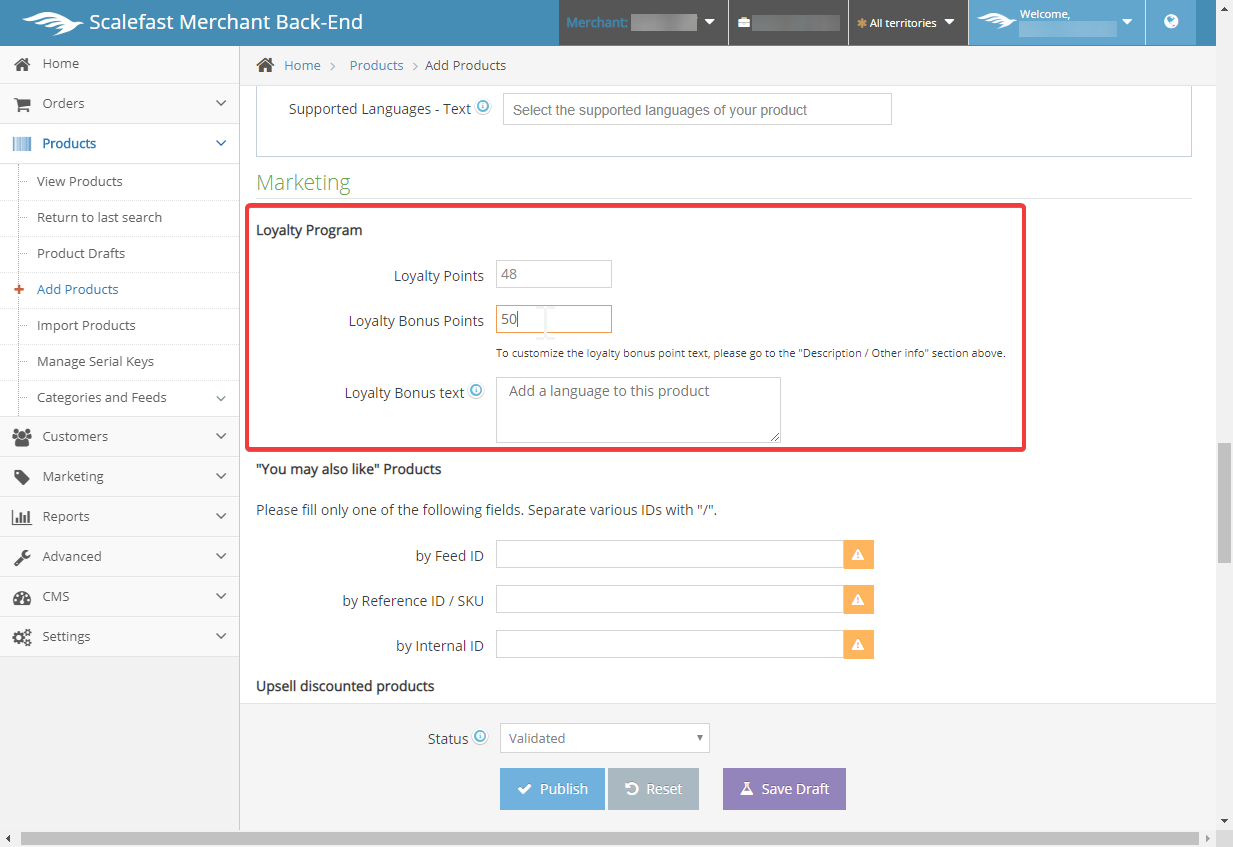
Scroll below this section to the Marketing section. The marketing section contains loyalty points, related products, upsell discounted products, and ratings.
If you would like to add loyalty points to your product, you must have a loyalty program setup on your store. If your store features a loyalty program, the points added in this section will apply and display on your product page. For more details on the loyalty program, go to Loyalty Program.
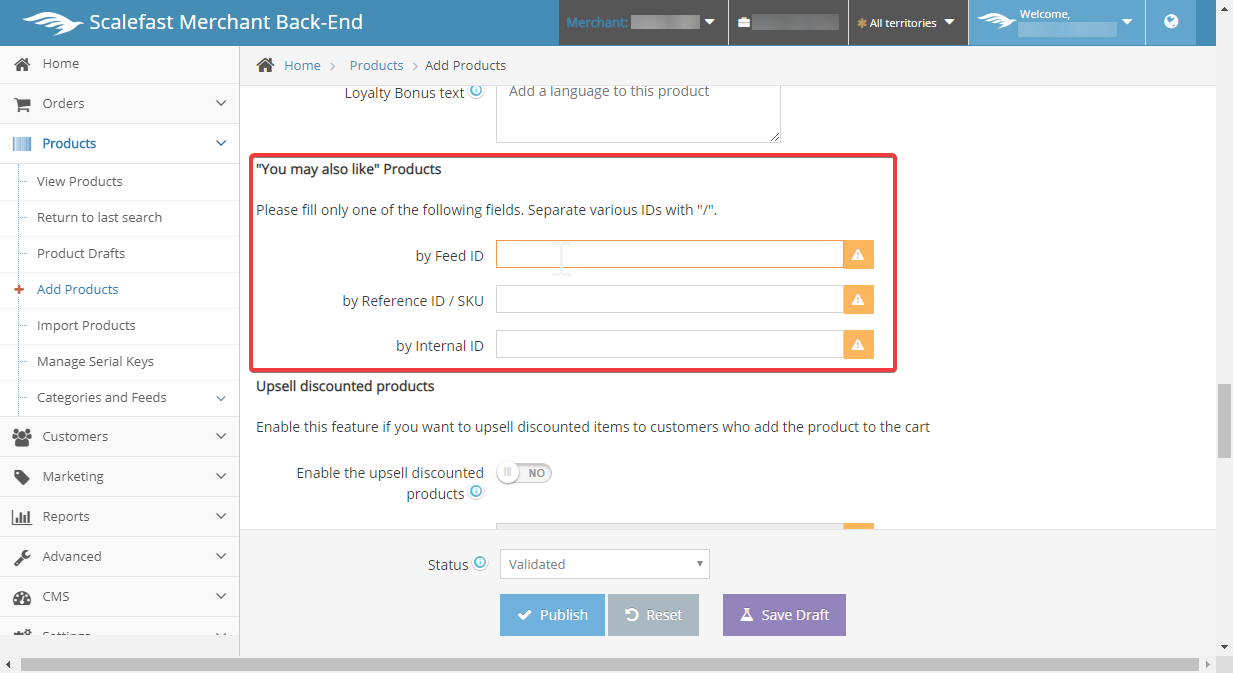
If your product has related products that the customer may be interested in, or that they typically buy in the same order, fill in the "You may also like" Products fields.
Only fill in one of the three fields to configure correctly. Products can be selected by Feed ID, Reference ID / SKU, or by Internal ID.
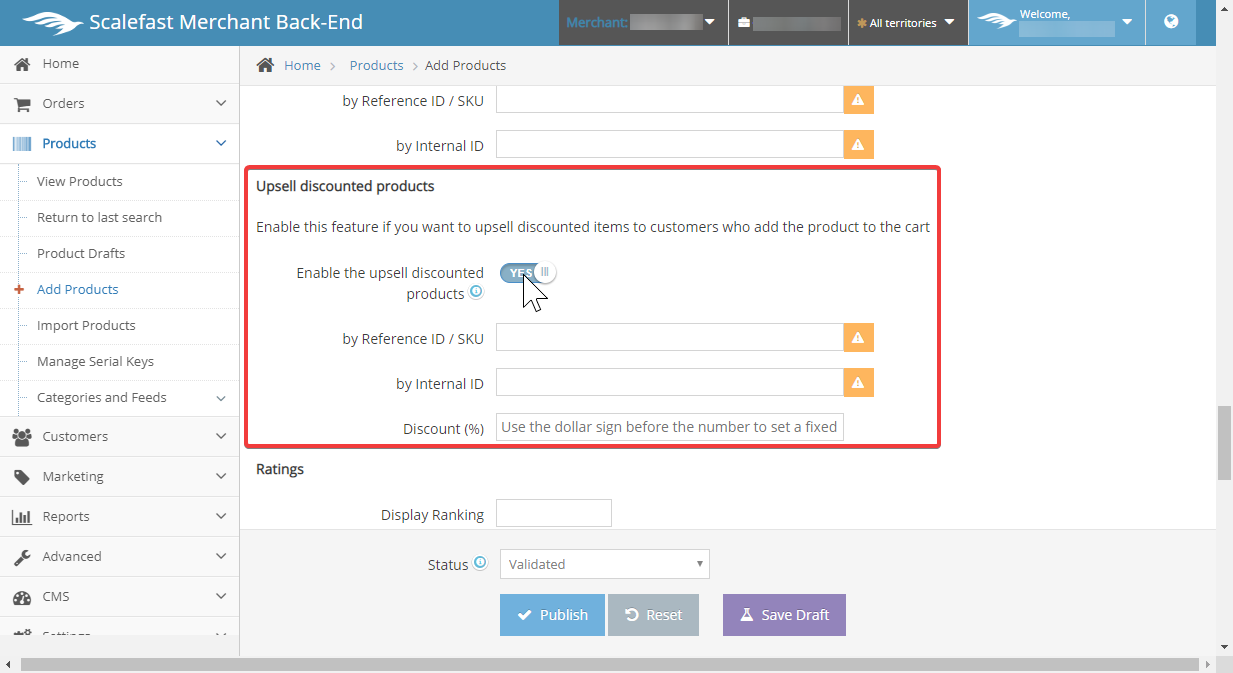
If you would like to upsell discounted products with your new product, Enable the default "No" switch to "Yes".
The three associated fields below then enable editing so that Reference ID / SKU, Internal ID, and Discount can be entered. By default, the Discount field will discount the upsell products by percentage. For a fixed discount, add the $ sign before the number.
Release Date & Pre-Orders
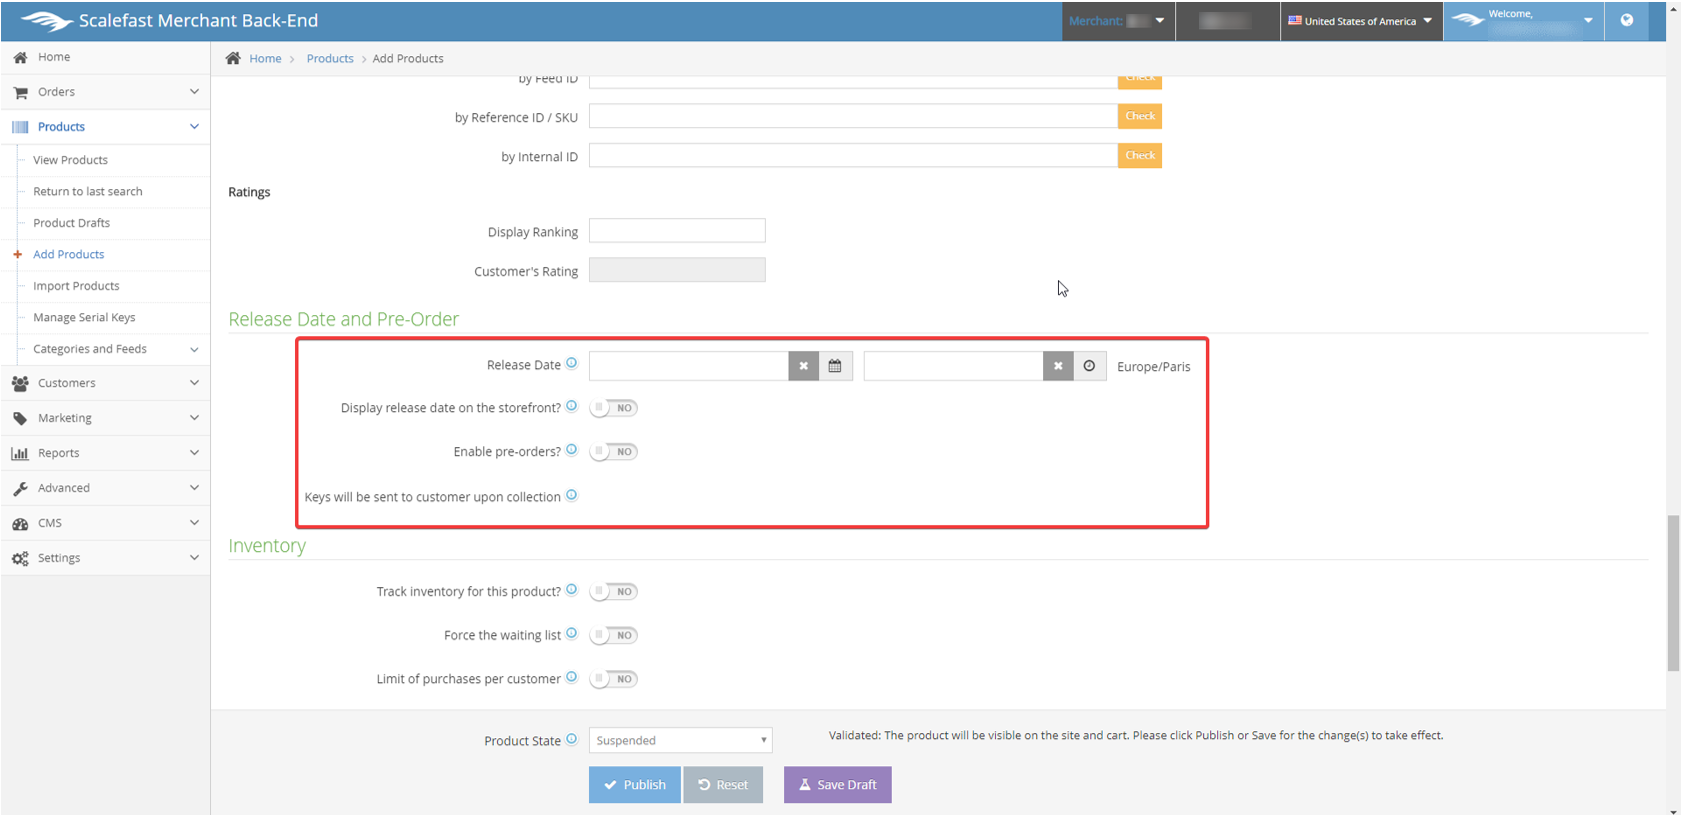
Scroll below to the Release Date & Pre-orders section.
Select the release date of the product, and whether it will be displayed on the product page publicly or not. Release date can be set for the past, today's date, or the future.
If the product is a pre-order, the release date is typically set for a future date. For details on pre-orders and auto-collect, go to Auto Collect.
Next, scroll down to the Inventory section. If you would like to track inventory for this product, switch the toggle button from "NO" to "YES". A number of fields related to inventory tracking will appear below.
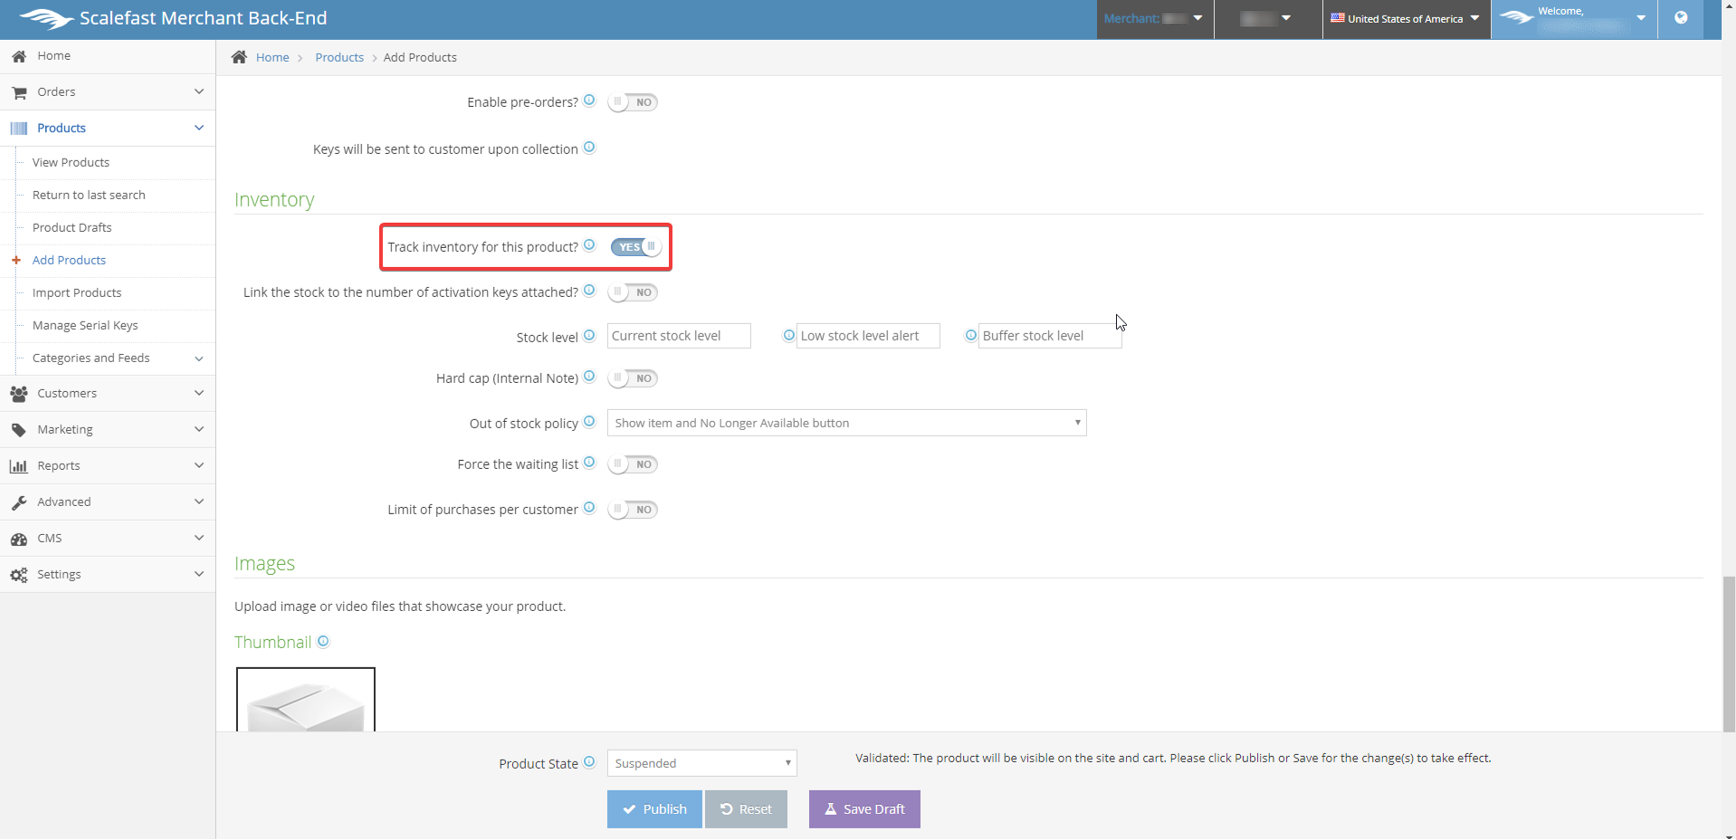
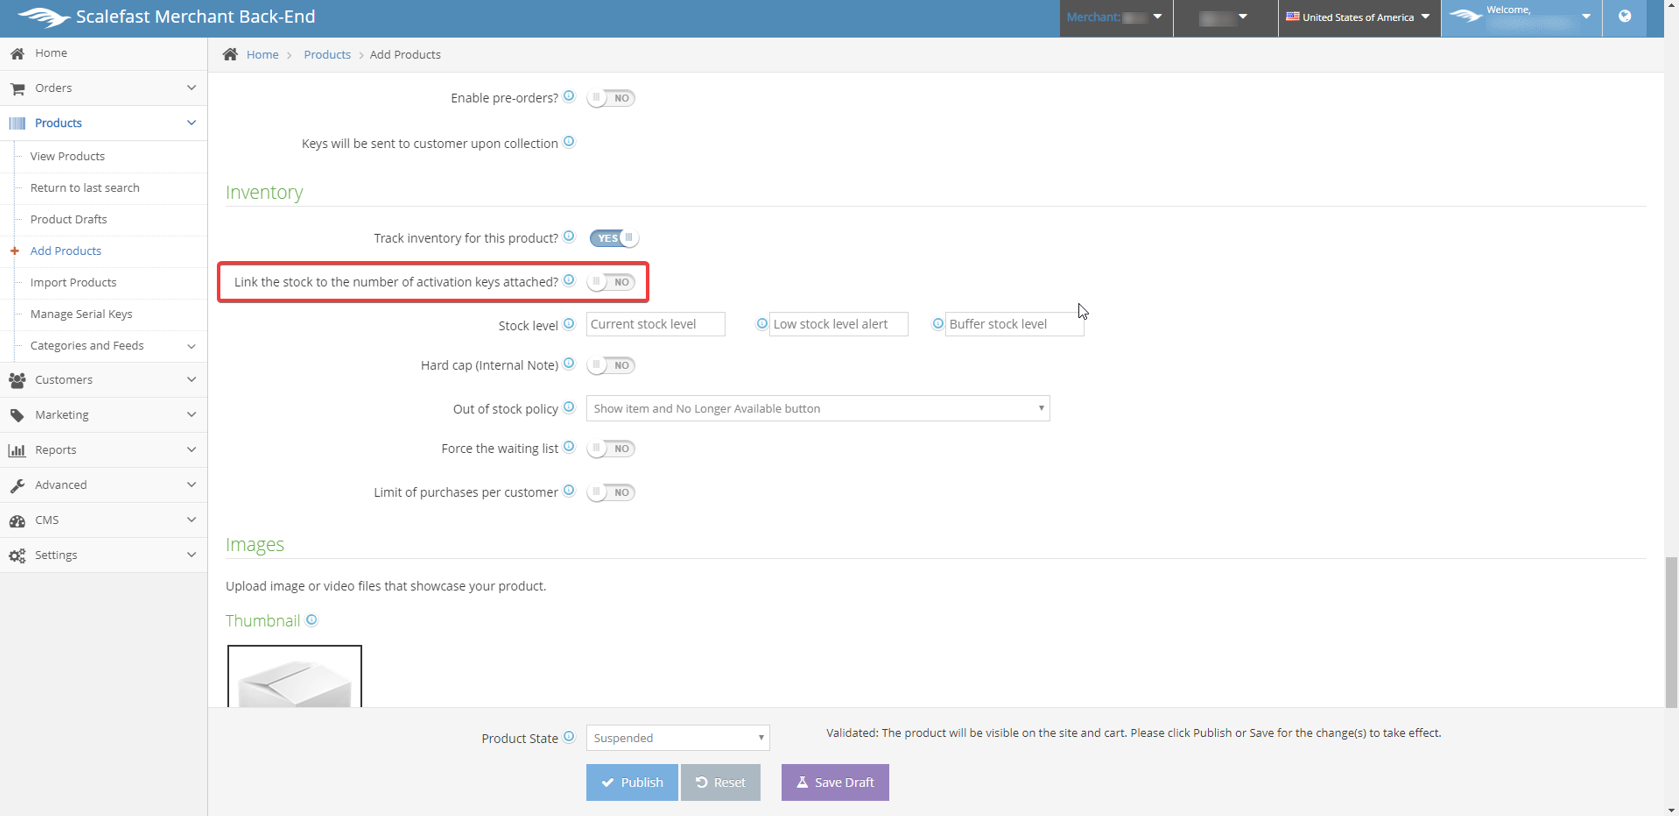
If activation keys are delivered upon the purchase of your product, switch the default from "No" to "Yes". This will link to the number of activation keys that have been uploaded into the Back Office. For more information on activation and digital keys, go to Digital & Activation Keys.
The stock level can be set manually in this section. If the products are pre-orders, this field can still be set. If you would like to receive an email alert when the stock reaches a certain level, add the stock level at which you would like to receive the alert. Buffer stock is the quantity retained by the warehouse for customer service needs. Leave this field blank if this does not apply to your product.
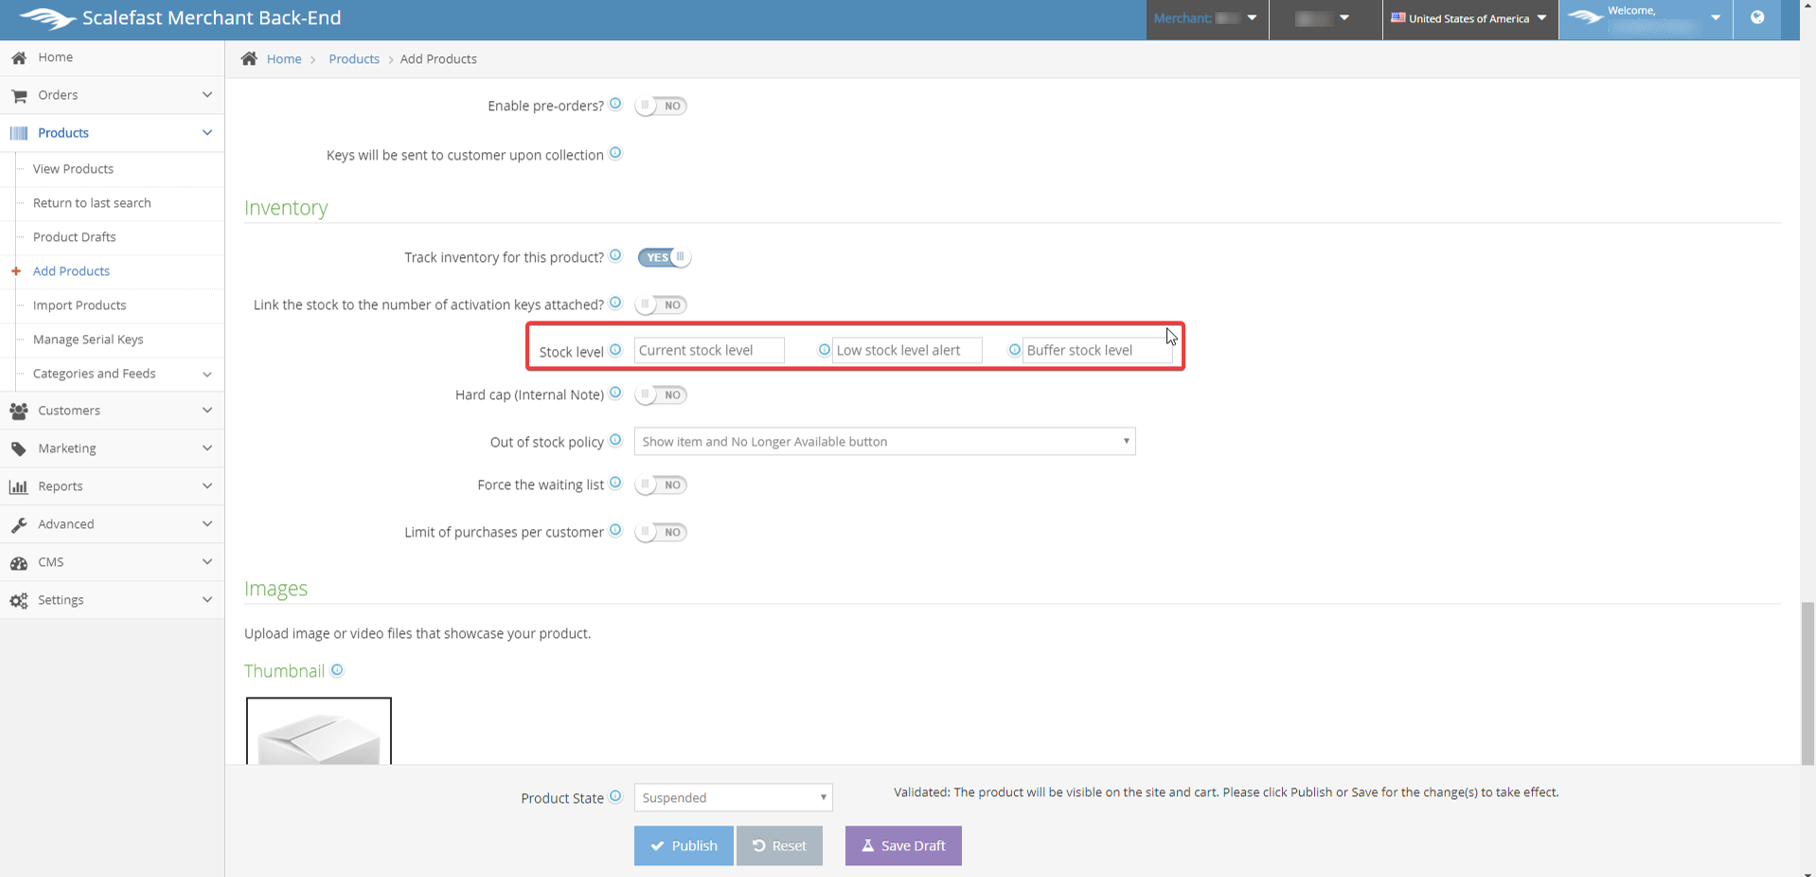
Hard cap will not allow more than the number of units set in this field to be purchased.

Out of stock policy contains four options in its drop down. By default, "Show item and No Longer Available button" will display. To display the item, even when stock gets to 0, select “Back Order”. If the item needs to be hidden when stock gets to 0, select “Hide this item”. The last selection, “Show item and Waiting List button”, will allow your customer to still see the item, but instead of being able to add to cart to purchase, they will have the option to opt-in on the waiting list. A reminder can be sent out to the waiting list from the Back Office when the product is back in stock. See Customer Communications for more details.
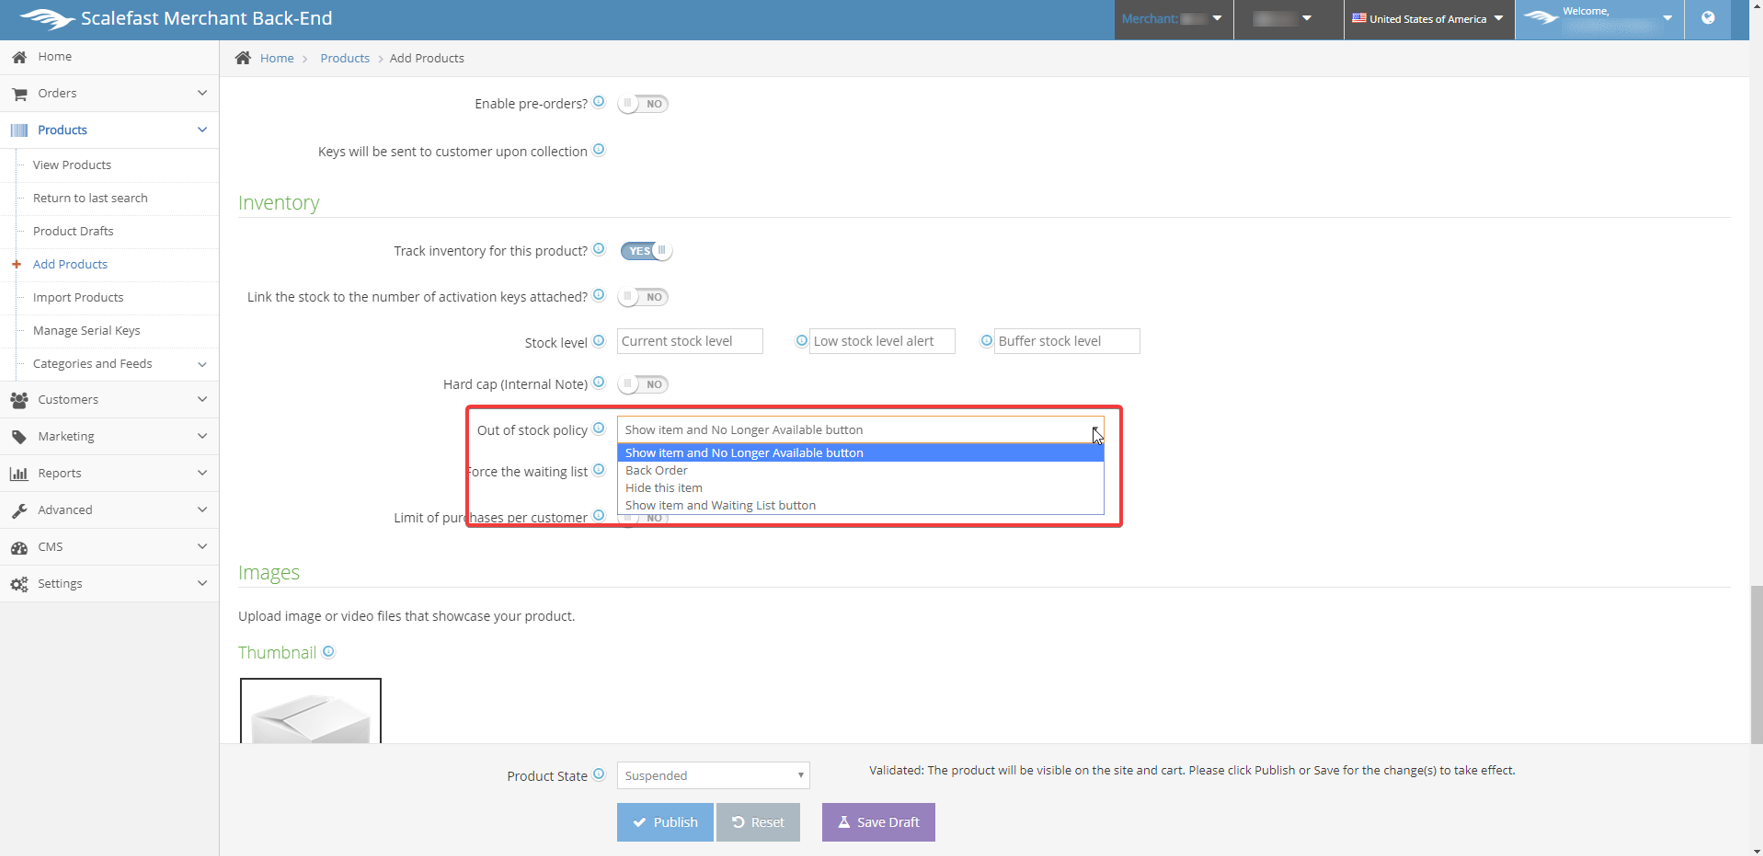
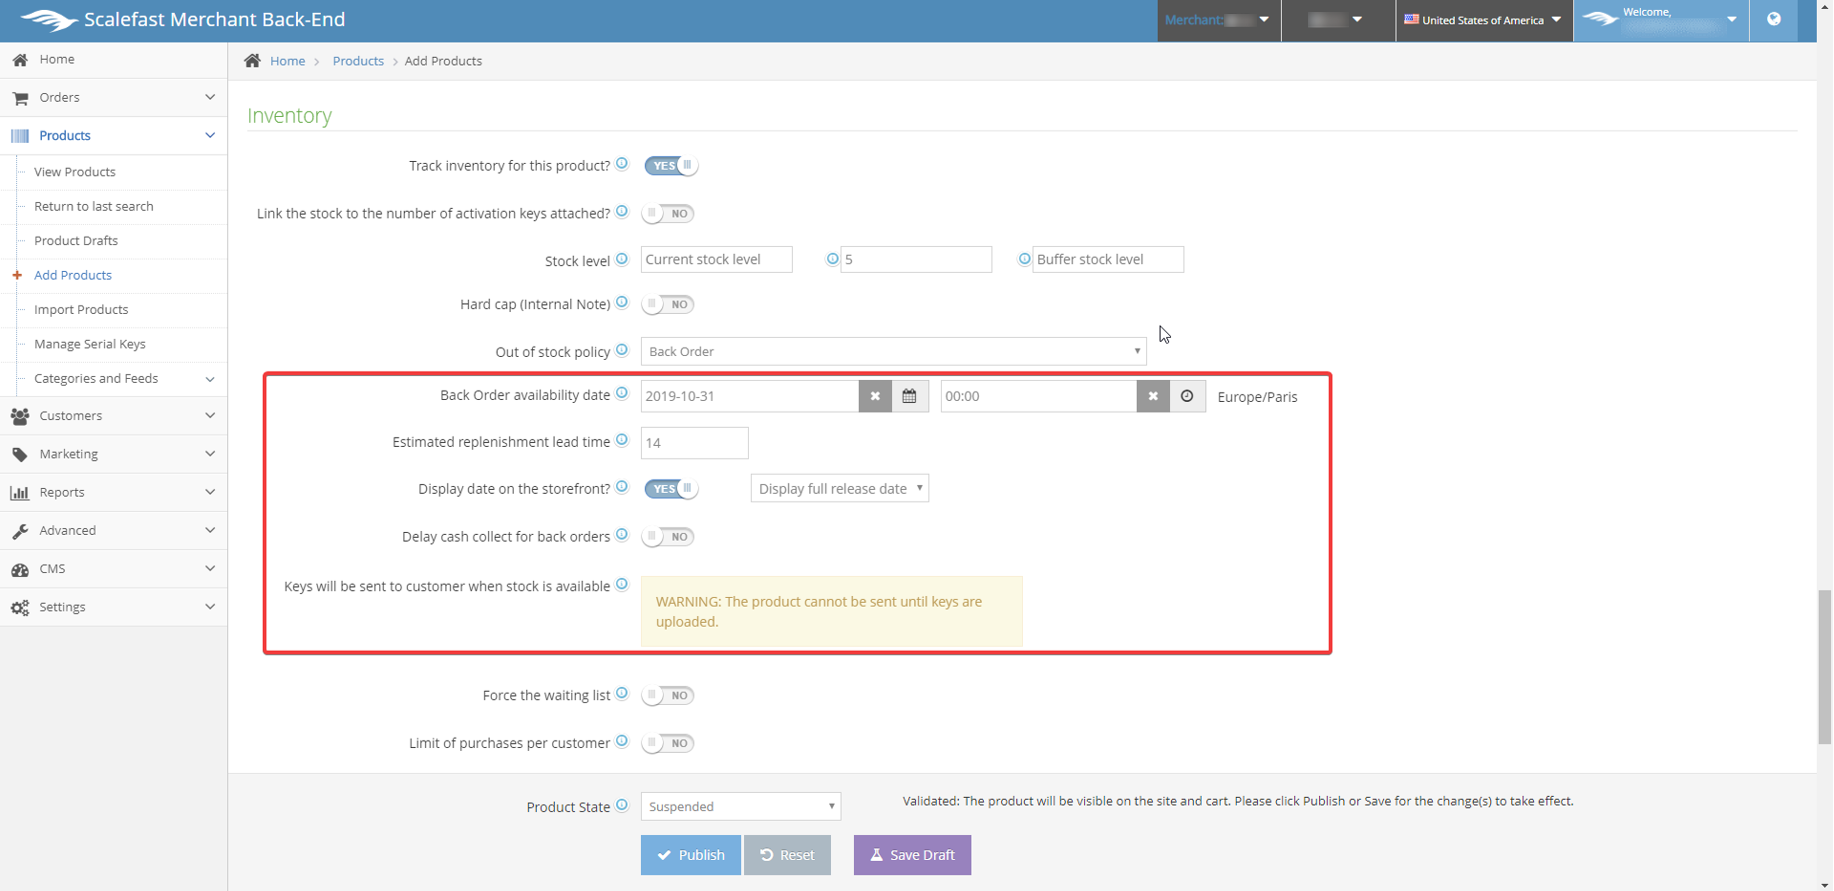
If “Back Order” is chosen for the out of stock policy, these additional options will appear:
- Back Order availability date: The date and time the product is expected to be available again. If unsure about the exact date, please enter an estimated date. We will send a notification prior to this date in case any change is needed. Please enable back order notifications on the project settings to receive this email.
- Estimated replenishment lead time: The estimated amount of time it takes for the product to be replenished once stock runs out. When this date changes for a back order product, we notify all customers who have pending orders containing this product.
- Display date on the storefront?: Choose whether or not to display the back order availability date on the storefront. You may also choose to display a custom message instead.
- Delay cash collect for back orders: Orders containing a back order product are typically debited when the order is placed. However, you may choose YES to wait and debit the order when the product is back in stock.
- Products / Keys will be sent to customer when stock is available: When stock is replenished, for physical products, EDI’s will be sent to the logistics partner. For digital products, keys will be sent to the customer.
Depending on the store configuration, for orders containing back order products, we either:
- By default, ship each individual product as it become available or
- Give the customer the option to wait and receive all products in 1 shipment when they are all in stock.
Bundles containing a back order product will be set to “back order” status as well. When all products in the bundle are available, EDI’s and / or digital keys will be sent.
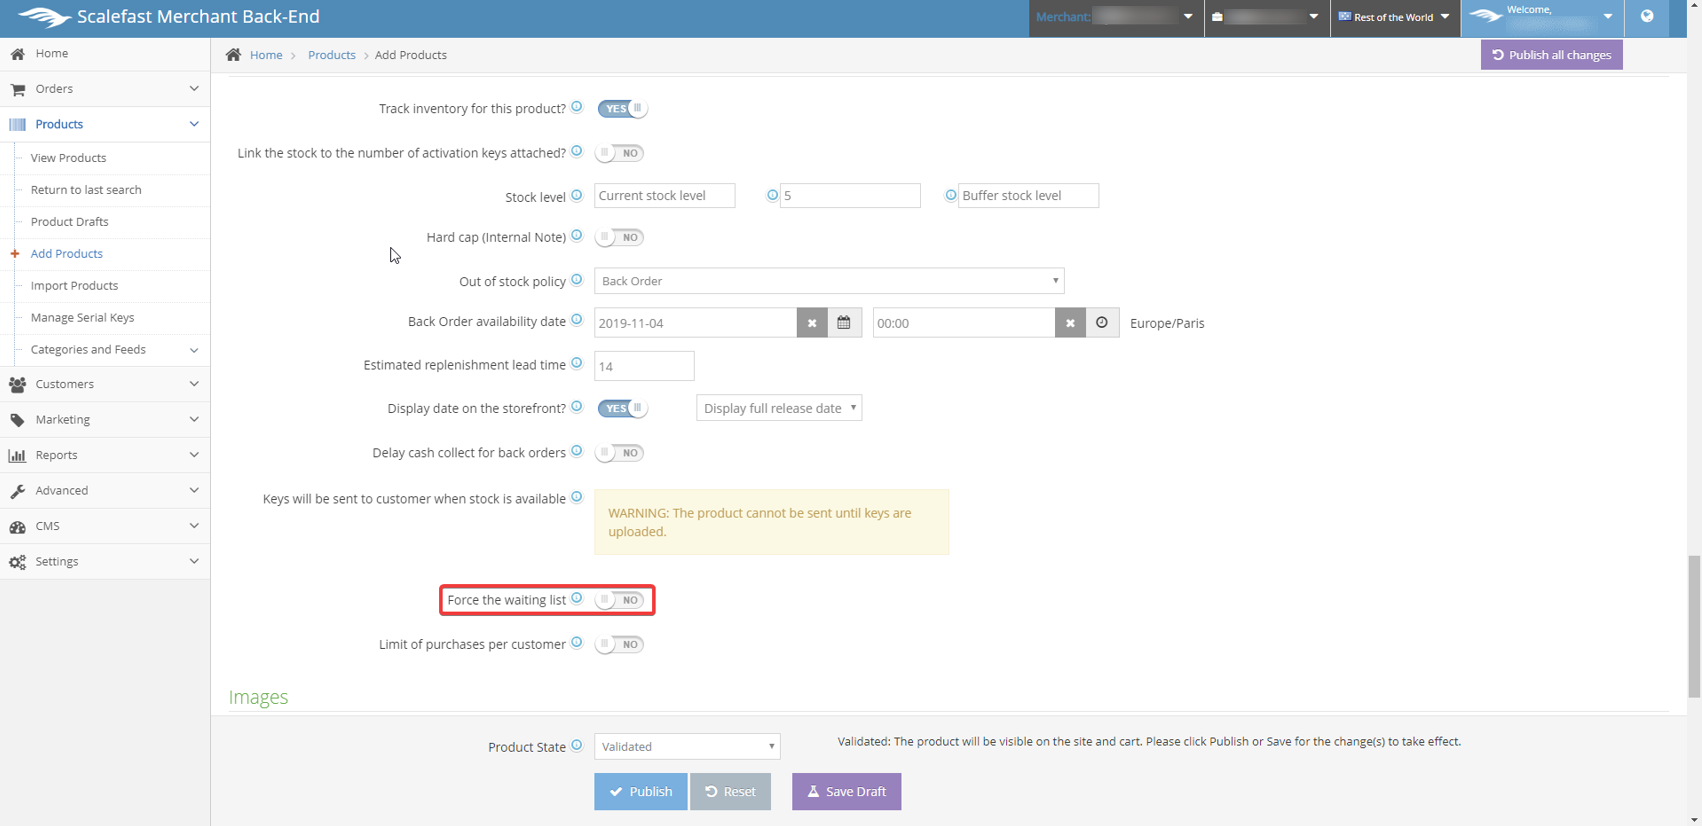
If the “Force the waiting list” is switched from default "No" to "Yes", the product will only display a waiting list opt-in field for customers to add their email. You may choose to show or hide the price when forcing the waiting list.
To limit the amount of units a customer can purchase with each order, switch the default "No" field to "Yes" and set the number of units for the limit.

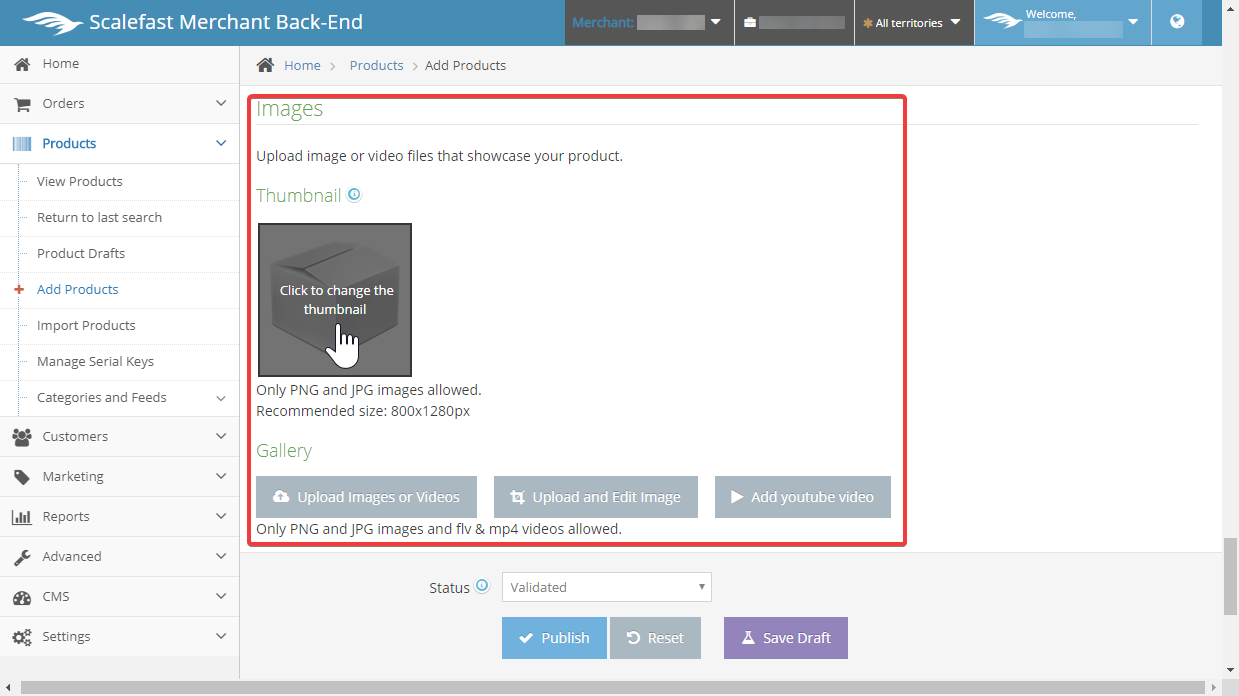
Next, scroll down to the Images section. First, click on the shipping box image to upload the thumbnail image for your product. Recommended dimensions: 300px by 430px, PNG or JPG only.
To upload additional images or videos, use the buttons in the Gallery section. Recommended dimensions: 800px by 1280px, PNG, JPG, FLV, MP4 formats only.
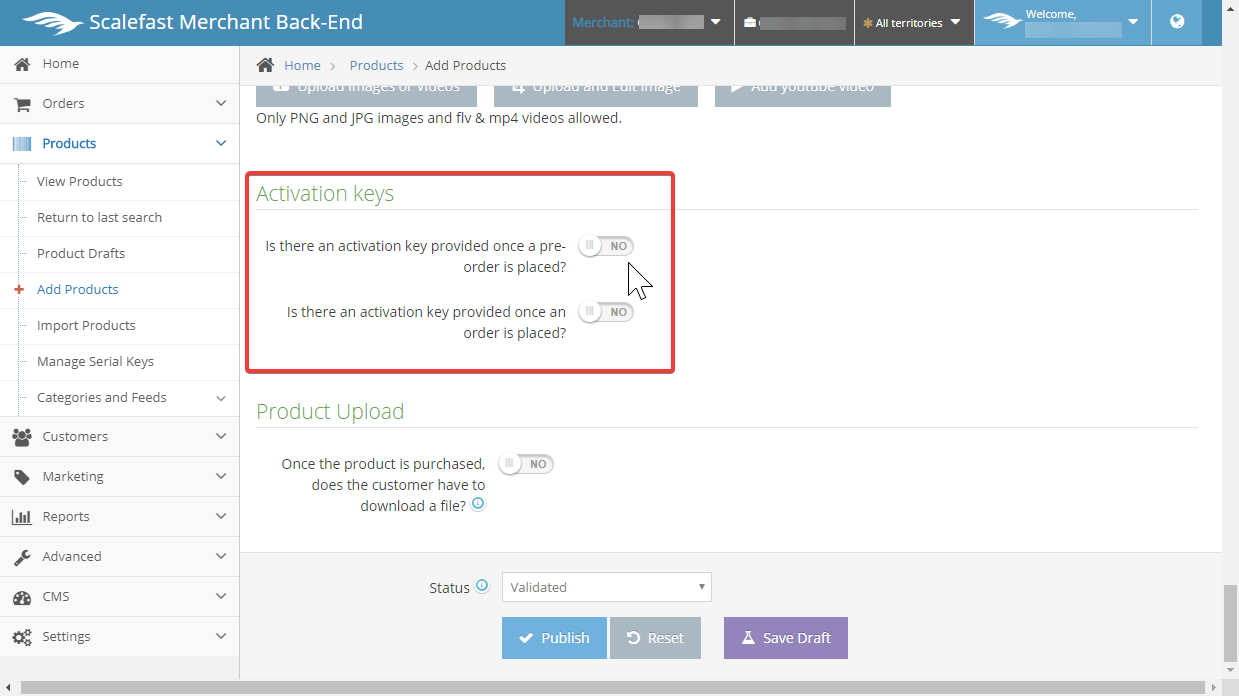
After uploading the images for your products, scroll down below to the Activation Keys section. If there are no activation keys that need to be provided once a pre-order is placed, leave the "No" switch to its default. If there is no activation key provided once an order is placed, also leave the "No" switch to its default.
For more information on Activation Keys, go to Digital & Activation Keys.
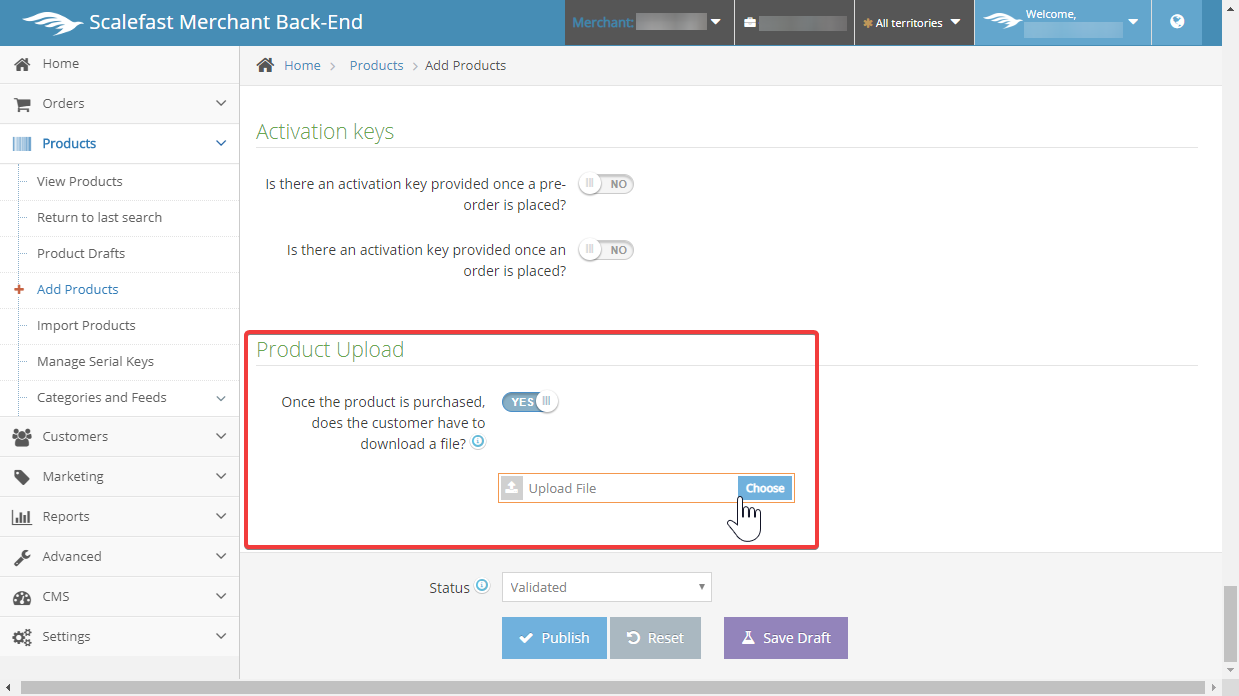
The last section is Product Upload. If the product is a digital, and the customer has to download a file after it is purchased, switch the default "No" to "Yes".
When "Yes" is selected, an upload field will display. Click "Choose" to select a file for upload.
Publishing
To publish your product, select Publish button at the bottom. If you do not yet want to make the product live, Save Draft can be selected.
Be sure to select the appropriate Status pertaining to your product. Status include:
- Validated - Product is live, active, and will be visible to the public once published.
- Confirmed - Visible to the public but cannot be purchased.
- Deleted - Select if product needs to be removed from the store.
- Suspended - Select if product is no longer being sold on store, but would like to keep the product info.
- Invisible - Product not visible in the store. Page will 404 error if it was previously bookmarked by customer.
- Sub-product - If product is a sub-product or related to main product.
Conclusion
Adding a new product may require many details, but the more details, the more information there will be for the customer to make an informed decision on the product they're potentially going to purchase.